In the tenth post of our actix-web learning application, we added an ad hoc middleware. In this post, with the assistance of the actix-web-lab crate, we will refactor this ad hoc middleware into a standalone async function to enhance the overall code readability.
The
actix-web
learning application mentioned above has been discussed
in the twelve previous posts. The index of the complete series
can be found here.
The code we’re developing in this post is a continuation
of the code from the
twelfth
post. 🚀 To get the code of this
twelfth
post, please use the following command:
While this post continues from previous posts in this series, it can be read in conjunction with only the tenth post, focusing particularly on the section titled Code Updated in the src/lib.rs Module.
❶ For this post, no new modules are introduced. Instead, we will update existing modules and files. The layout chart below displays the updated files and modules, with those marked with ★ indicating the ones that have been updated.
We added the new crate actix-web-lab. This crate is:
In-progress extractors and middleware for Actix Web.
This crate provides mechanisms for implementing middlewares as
standalone async functions, rather than using actix-web‘s
wrap_fn.
According to the documentation, the
actix-web-lab crate is essentially
experimental. Functionalities implemented in this crate might eventually be
integrated into the
actix-web
crate. In such a case, we would need to update our code.
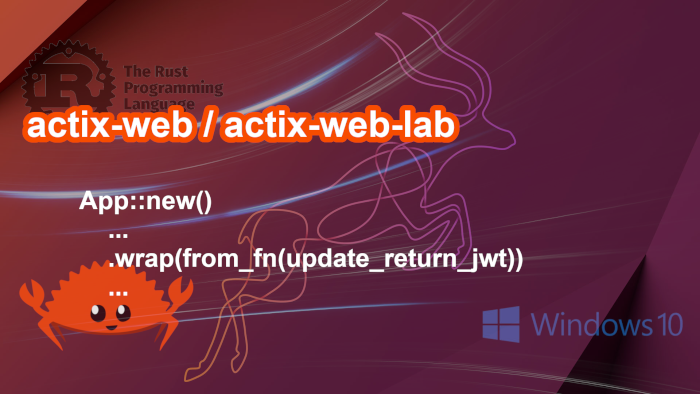
❸ Refactor an existing ad hoc middleware out of
wrap_fn.
As mentioned at the beginning, this post should be read in conjunction with the
tenth
post, where we introduced this
ad hoc middleware.
The description of this simple middleware functionality is found in the section
Code Updated in the src/lib.rs Module
of the tenth post.
Below, we reprint the code of this ad hoc middleware:
            //
            // This ad hoc middleware looks for the updated access token String attachment in
            // the request extension, if there is one, extracts it and sends it to the client
            // via both the ``authorization`` header and cookie.
            //
            .wrap_fn(|req, srv| {
                let mut updated_access_token: Option<String> = None;

                // Get set in src/auth_middleware.rs's
                // fn update_and_set_updated_token(request: &ServiceRequest, token_status: TokenStatus).
                if let Some(token) = req.extensions_mut().get::<String>() {
                    updated_access_token = Some(token.to_string());
                }

                srv.call(req).map(move |mut res| {

                    if updated_access_token.is_some() {
                        let token = updated_access_token.unwrap();
                        res.as_mut().unwrap().headers_mut().append(
                            header::AUTHORIZATION,
                            header::HeaderValue::from_str(token.as_str()).expect(TOKEN_STR_JWT_MSG)
                        );

                        let _ = res.as_mut().unwrap().response_mut().add_cookie(
                            &build_authorization_cookie(&token));
                    };

                    res
                })
            })
It’s not particularly lengthy, but its inclusion in the application instance
construction process makes it difficult to read. While
closures
can call
functions, refactoring this implementation
into a standalone function isn’t feasible. This is because the function would
require access to the parameter srv, which in this case refers to
the AppRouting
struct. Please refer to the screenshot below for clarification:
The AppRouting struct is located in the private module
actix-web/src/app_service.rs,
which means we don’t have direct access to it. I attempted to refactor it into a standalone
function but encountered difficulties. Someone else had also attempted it before me and
faced similar issues.
I believe I’ve come across this crate before, particularly the function
actix_web_lab::middleware::from_fn,
but it didn’t register with me at the time.
Compared to the original ad hoc middleware, the code is virtually unchanged.
It’s worth noting that this final version is the result of my sixth or seventh attempt;
without the compiler suggestions, I would not have been able to complete it. We register
it with the application instance using only a
single line, as per the documentation:
Currently, the src/lib.rs module is less than 250 lines
long, housing 7 helper functions that are completely unrelated. I find it still very
manageable. The code responsible for creating the server instance and the application
instance, encapsulated in the function
pub async fn run(listener: TcpListener) -> Result<Server, std::io::Error>,
remains around 60 lines. Although I anticipate it will grow a bit more as
we add more functionalities, I don’t foresee it becoming overly lengthy.
❺ I am happy to have learned something new about
actix-web.
And I hope you find the information useful. Thank you for reading. And stay safe, as always.
In the last post of our actix-web learning application, we identified two problems. First, there is an issue with calculating the UTC time offset on Ubuntu 22.10, as described in the section 💥 Issue with calculating UTC time offset on Ubuntu 22.10. Secondly, loggings from other crates that match the logging configuration are also written onto log files, as mentioned in the Concluding Remarks section. We should be able to configure what gets logged. We will address both of these issues in this post.
The
actix-web
learning application mentioned above has been discussed
in the eleven previous posts. The index of the complete series
can be found here.
The code we’re developing in this post is a continuation
of the code from the
eleventh
post. 🚀 To get the code of this
eleventh
post, please use the following command:
While this post continues from previous posts in this series,
it can be read in conjunction with only the
eleventh
post.
❶ For this post, no new modules are introduced. Instead, we will update some existing modules and files. The layout chart below shows the updated files and modules, with those marked with ★ indicating the updated ones.
Document #293 is dated December 19, 2020. Additionally, there
are other relevant documents that I did not come across during my previous
“extensive searching”:
This reply posted on February 13, 2022
mentions the crate time-tz, which resolves the previously mentioned issue.
The parameter utc_offset: time::UtcOffset was removed from the function
pub fn init_app_logger() -> WorkerGuard, and the offset
calculation is now carried out internally:
    let timer = OffsetTime::new(
        localtime.offset(),
        format_description!("[year]-[month]-[day] [hour]:[minute]:[second]"),
    );
We use tracing_subscriber‘s filter::EnvFilter struct to filter which events are logged. This functionality requires the crate feature env-filter, as described above.
Event filtering is configured via the environment variable RUST_LOG. Its value can be much more sophisticated than simply trace, debug, info, warn and error. The documentation in the section Enabling logging of the env_logger crate describes the syntax of RUST_LOG with plenty of informative examples.
⓶ As for the value of RUST_LOG, there are three cases that do not behave as I initially assumed:
The first two cases are RUST_LOG=xxxx and RUST_LOG=, where nothing gets logged. I had assumed that this error handling would default the logging event to debug:
.or_else(|_| EnvFilter::try_new("debug"))
I attempted several times to default them to debug, but unfortunately, I was unsuccessful.
The third case is RUST_LOG, where only the RUST_LOG variable name is present in the .env file without any value assigned to it. Based on the above two instances, I expected that nothing would be logged. However, it defaults to debug!
Please note that for the next example discussion, it’s important to keep in mind that the
Cargo.toml
file contains the following declaration, where
learn_actix_web is defined:
[[bin]]
path = "src/main.rs"
name = "learn_actix_web"
Examples of some valid values:
RUST_LOG=off,learn_actix_web=debug — Only debug logging events from the learn_actix_web crate are logged. All logging events from other crates are ignored.
RUST_LOG=off,learn_actix_web=info — Only info logging events from the application are logged. If there are no info events in the application, nothing gets logged and the log files remain empty.
RUST_LOG=off,learn_actix_web=debug,actix_server=info — Only debug events from the application and info events from the actix_server crate are logged.
RUST_LOG=off,learn_actix_web::middleware=debug — Only debug events from the src/middleware.rs module of the application are logged. This middleware is triggered when accessing the GET route http://0.0.0.0:5000/helloemployee/{partial last name}/{partial first name} from an authenticated session.
A further illustration for example 4 above: Log in and click on the last button as shown in the screenshot below:
The current log file should contain the following three new lines:
2024-03-18 00:51:15 DEBUG learn_actix_web::middleware: Hi from start. You requested: /helloemployee/%chi/%ak
2024-03-18 00:51:15 DEBUG learn_actix_web::middleware: Middleware. last name: %chi, first name: %ak.
2024-03-18 00:51:15 DEBUG learn_actix_web::middleware: Hi from response -- some employees found.
This finer control demonstrates the power, utility, and helpfulness of tracking an intermittent bug that is not reproducible on staging and development environments. By enabling debug and tracing logging for specific modules, we can effectively troubleshoot such issues.
❹ Logging events should be grouped within the unique ID of the
authenticated session.
For each authenticated session, there is a third-party session ID. I have conducted some studies on this cookie, and its value seems to change after each request. For further discussion of this ID under HTTPS, please refer to this discussion.
My initial plan is to group logging for each request under the value of this ID. For example:
** 2024-03-18 00:51:15 DEBUG learn_actix_web::middleware: {value of id} entered.
2024-03-18 00:51:15 DEBUG learn_actix_web::middleware: Hi from start. You requested: /helloemployee/%chi/%ak
...
** 2024-03-18 00:51:15 DEBUG learn_actix_web::middleware: {value of id} exited.
I have not yet determined how to achieve this; further study is required.
❺ We have concluded this post. I’m pleased to have resolved the offset issue and to have implemented logging in a more effective manner.
I hope you find the information useful. Thank you for reading. And stay safe, as always.
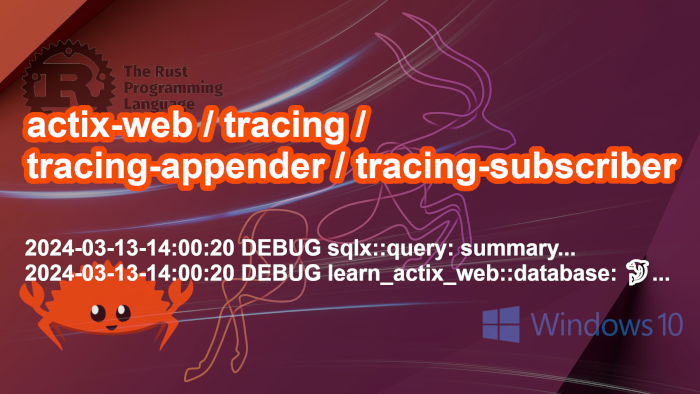
Currently, our actix-web learning application simply prints debug information to the console using the println! macro. In this post, we will implement proper non-blocking daily logging to files. Daily logging entails rotating to a new log file each day. Non-blocking refers to having a dedicated thread for file writing operations. We will utilise the tracing, tracing-appender, and tracing-subscriber crates for our logging implementation.
The code we’re developing in this post is a continuation
of the code from the
tenth
post above. 🚀 To get the code of this
tenth
post, please use the following command:
While this post continues from previous posts in this series, it can also be read independently. The logging module developed herein can be used in other projects without modification.
❶ For this post, we introduce a new module src/helper/app_logger.rs,
and some other modules and files are updated. The project layout remains the same as in the
last post.
The layout chart below shows the affected files and modules:
— Please note that files marked with ★
are updated, and src/helper/app_logger.rs is marked with ☆,
as it is the only new module.
❷ An update to the
.env file:
a new entry has been added:
RUST_LOG=debug
The value of RUST_LOG is translated into
tracing::Level. Valid
values include trace, debug, info,
warn and error. Any other values are invalid and will default to
Level::DEBUG.
❸ Updates to the
Cargo.toml
file: as expected, the new crates are added to the [dependencies]
section.
❹ 💥 Issue with calculating UTC time offset on Ubuntu 22.10.
In the new code added for this post, we need to calculate the UTC time offset to obtain local time. The following code works on Windows 10:
use time::UtcOffset;

let offset = UtcOffset::current_local_offset().unwrap();
However, on Ubuntu 22.10, it doesn’t always function as expected.
Sometimes, it raises the error
IndeterminateOffset.
The inconsistency in its behavior makes it challenging to identify a
clear pattern of when it works and when it doesn’t.
This complication adds an extra layer of difficulty in ensuring both the code and integration tests function properly. In the subsequent sections of this post, when discussing the code, we’ll refer back to this issue when relevant. Please keep this in mind.
❺ The src/helper/app_logger.rs
module has been designed to be easily copied into other projects, provided that the
Cargo.toml file includes the required crates
discussed earlier.
This module contains only a single public function,
pub fn init_app_logger(utc_offset: time::UtcOffset) -> WorkerGuard,
which the application calls to set up the log. Please refer to the notes and documentation within this module while reading the code.
Originally, the utc_offset: time::UtcOffset parameter was not present.
However, due to the issue mentioned in
💥 Issue with calculating UTC time offset on Ubuntu 22.10,
the code was refactored to include this parameter, offering a bit more flexibility.
⓵ Setting up the daily log files.
    let log_appender = RollingFileAppender::builder()
        .rotation(Rotation::DAILY) // Daily log file.
        .filename_suffix("log") // log file names will be suffixed with `.log`
        .build("./log") // try to build an appender that stores log files in `/var/log`
        .expect("Initialising rolling file appender failed");
We specify
DAILY rotation to generate
daily log files. However, it’s important to note that according to
the documentation,
the file names are appended with the current date in UTC.
Since I’m in the Australian Eastern Standard Time (AEST) zone, which is 10-11 hours ahead of UTC, there were instances where my log file names were created with dates from the previous day.
This function returns a tuple of NonBlocking and WorkerGuard. NonBlocking implements MakeWriter which integrates with tracing_subscriber. WorkerGuard is a drop guard that is responsible for flushing any remaining logs when the program terminates.
Note that the WorkerGuard returned by non_blockingmust be assigned to a binding that is not _, as _ will result in the WorkerGuard being dropped immediately. Unintentional drops of WorkerGuard remove the guarantee that logs will be flushed during a program’s termination, in a panic or otherwise.
What this means is that we must keep log_guard alive for the application
to continue logging. log_guard is an instance of the
WorkerGuard struct and is also
the returned value of the public function
pub fn init_app_logger(utc_offset: time::UtcOffset) -> WorkerGuard.
We will revisit this returned value in a later section.
⓷ Next, we specify the date and time format for each log line. Each line begins with a local date and time. For instance,
2024-03-12-08:19:13:
    // Each log line starts with a local date and time token.
    //
    // On Ubuntu 22.10, calling UtcOffset::current_local_offset().unwrap() after non_blocking()
    // causes IndeterminateOffset error!!
    //
    // See also https://github.com/time-rs/time/pull/297.
    //
    let timer = OffsetTime::new(
        //UtcOffset::current_local_offset().unwrap(),
        utc_offset,
        format_description!("[year]-[month]-[day]-[hour]:[minute]:[second]"),
    );
We’ve discussed local dates in some detail in
this post.
🚀 Please note that this is a local date and time. In my time zone,
Australian Eastern Standard Time (AEST), which is 10-11 hours ahead of UTC,
the log file name for a log line that starts with
2024-03-12-08:19:13 would actually be log/2024-03-11.log.
⓸ Next, we attempt to define the
tracing::Level
based on the environment variable RUST_LOG discussed
previously:
    // Extracts tracing::Level from .env RUST_LOG, if there is any problem,
    // defaults to Level::DEBUG.
    //
    let level: Level = match std::env::var_os("RUST_LOG") {
        None => Level::DEBUG,

        Some(text) => {
            match Level::from_str(text.to_str().unwrap()) {
                Ok(val) => val,
                Err(_) => Level::DEBUG
            }
        }
    };
💥 I initially assumed that having RUST_LOG defined in the environment file .env would suffice. However, it turns out that we need to explicitly set it in the code.
⓹ We then proceed to “create a subscriber”, I hope I’m using the
correct terminology:
🚀 .and(std::io::stdout.with_max_level(level)) means that anything logged to the log file will also be printed to the console.
⓺ Next, the new
Subscriber
is set as the global default for the duration of the entire program:
    // tracing::subscriber::set_global_default(subscriber) can only be called once.
    // Subsequent calls raise SetGlobalDefaultError, ignore these errors.
    //
    // There are integeration test methods which call this init_app_logger(...) repeatedly!!
    //
    match tracing::subscriber::set_global_default(subscriber) {
        Err(err) => tracing::error!("Logger set_global_default, ignored: {}", err),
        _ => (),
    }
Can only be set once; subsequent attempts to set the global default will fail. Returns whether the initialization was successful.
Since some integration test methods call the
pub fn init_app_logger(utc_offset: time::UtcOffset) -> WorkerGuard
more than once, we catch potential errors and ignore them.
    // Call this to load RUST_LOG.
    dotenv().ok();

    // Calling UtcOffset::current_local_offset().unwrap() here works in Ubuntu 22.10, i.e.,
    // it does not raise the IndeterminateOffset error.
    //
    // TO_DO. But this does not guarantee that it will always work!
    //
    let _guards = init_app_logger(UtcOffset::current_local_offset().unwrap());
    // To load RUST_LOG from .env file.
    dotenv().ok();

    /*
    On Ubuntu 22.10, calling UtcOffset's offset methods causes IndeterminateOffset error!!

    See also https://github.com/time-rs/time/pull/297

    ...
    */

    // TO_DO: 11 is the current number of hours the Australian Eastern Standard Time (AEST)
    // is ahead of UTC. This value need to be worked out dynamically -- if it is at all
    // possible on Linux!!
    //
    let guard = init_app_logger(UtcOffset::from_hms(11, 0, 0).unwrap());
— 👎 Unlike src/main.rs,
where UtcOffset::current_local_offset().unwrap() works,
calling it here consistently results in the
IndeterminateOffset error!
UtcOffset::from_hms(11, 0, 0).unwrap() works, but again, this is
not a guarantee it will keep working.
👎 The value 11 is hardcoded. Presently, the Australian Eastern Standard Time (AEST) zone is 11 hours ahead of UTC. To get the AEST date and time, we need to offset UTC by 11 hours. However, 11 is not a constant value; due to daylight savings, in Southern Hemisphere winters, it changes to 10 hours (I think). This means that this code will no longer be correct.
❽ We’ve reached the conclusion of this post. I’d like to mention that the ecosystem surrounding tracing and logging is incredibly vast. While this post only scratches the surface, it provides a complete working example nonetheless. We can build upon this foundation as needed.
The UTC offset issue on Ubuntu 22.10, as described, must be addressed definitively. However, that task is for another day.
I’m not entirely satisfied with the numerous debug loggings from other crates. These can be filtered and removed, but that’s a topic for another post, perhaps.
I hope you find the information useful. Thank you for reading. And stay safe, as always.
In the sixth post of our actix-web learning application, we implemented a basic email-password login process with a placeholder for a token. In this post, we will implement a comprehensive JSON Web Token (JWT)-based authentication system. We will utilise the jsonwebtoken crate, which we have previously studied.
The code we’re developing in this post is a continuation
of the code from the
ninth
post above. 🚀 To get the code of this
ninth
post, please use the following command:
🚀 It should be obvious that: this implementation implies SECONDS_VALID_FOR is the duration the token stays valid since last active. It does not mean that after this duration, the token becomes invalid or expired. So long as the client keeps sending requests while the token is valid, it will never expire!
Let’s revisit the specifications outlined in the previous section:
🚀 It should be obvious that: this implementation implies SECONDS_VALID_FOR is the duration the token stays valid since last active. It does not mean that after this duration, the token becomes invalid or expired. So long as the client keeps sending requests while the token is valid, it will never expire!
This concept involves extending the expiry time of a valid token every time
a request is made. This functionality was demonstrated in the original discussion,
specifically in the
second example
section mentioned earlier.
🦀 Since the expiry time is updated, we generate a new
access token.
Here’s what we do with the new token:
In an
API-like server or a service,
users are required to include a valid
access token
in the request authorization header. Therefore, if a new token is generated,
users should have access to this latest token.
What happens if users simply ignore the new tokens and continue using a previous
one that has not yet expired? In such a scenario,
request authentication
would still be successful, and the requests would potentially succeed until the
old token expires. However, a more serious concern arises if we implement blacklisting.
In that case, we would need to blacklist all previous tokens. This would necessitate
writing the current access token to a blacklist table for every request,
which is impractical.
🚀 This process makes sense, as we cannot expire a session while a user is
still actively using it.
However, we still encounter similar problems
as described
in the previous section for
API-like servers or services.
Since clients always have access to the
authorization
response header and cookie,
they can use this token with different client tools to send requests,
effectively treating the application as an
API-like server or a service.
In the module
src/helper/jwt_utils.rs,
we implement all the JWT management code, which includes the core essential
code that somewhat repeats the code already mentioned in the
second example:
struct JWTPayload
— represents the JWT payload, where the
email field uniquely identifies the logged-in user.
Methods to update the expiry field (exp) and
the last_active field using seconds, minutes, and hours.
Four getter methods which return the values of the iat,
email, exp, and last_active fields.
Additionally, there are two main functions:
pub fn make_token — creates a new JWT from an email.
The parameter secs_valid_for indicates how many seconds the token
is valid for, and the parameter secret_key is used by the
jsonwebtoken
crate to encode the token. It creates an instance of
struct JWTPayload,
and then creates a token using this instance.
pub fn decode_token — decodes a given token. If the token
is valid and successfully decoded, it returns the token’s
struct JWTPayload.
Otherwise, it returns an
ApiStatus
which describes the error.
Other functions are “convenient” functions or wrapper functions:
pub fn make_token_from_payload — creates a JWT from an
instance of struct
struct JWTPayload.
It is a “convenient” function. We decode the current token, update the extracted
payload, then call this function to create an updated token.
...
    // TO_DO: Work in progress -- future implementations will formalise access token.
    let access_token = &selected_login.email;

    // https://docs.rs/actix-identity/latest/actix_identity/
    // Attach a verified user identity to the active session
    Identity::login(&request.extensions(), String::from(access_token)).unwrap();
...
...
    let access_token = make_token(&selected_login.email,
        app_state.cfg.jwt_secret_key.as_ref(), app_state.cfg.jwt_mins_valid_for * 60);

    // https://docs.rs/actix-identity/latest/actix_identity/
    // Attach a verified user identity to the active session
    Identity::login(&request.extensions(), String::from( make_bearer_token(&access_token) )).unwrap();
...
Although the code has sufficient documentation, we will discuss the updates in the following sections.
⓵ The module documentation has been updated to describe how the
request authentication
process works with JWT. Please refer to the documentation section
How This Middleware Works
for more details.
When there is no token, is_logged_in is set to
false to indicate that the request comes from an unauthenticated session.
The other two fields are set to None, indicating that there is no error.
If token decoding fails or the token has already expired, is_logged_in
is set to false, and api_status is set to the returned
ApiStatus.
This indicates an error.
If token decoding succeeds, is_logged_in is set to to true,
and payload is set to the returned
JWTPayload.
As mentioned previously, if a valid token is
present, an updated token is generated from the current token’s payload every
time a request occurs. This updated
access tokenis then sent to the client via both the
response header and the response cookie authorization.
This section describes how the updated token is attached to the request extension so that the next adhoc middleware can pick it up and send it to the clients.
Afterward, it forwards the response. Since it is currently the last middleware in the call stack, the response will be sent directly to the client, completing the request.
Due to the issues outlined in
this section
and
this section,
we were unable to effectively implement the logout functionality in the application.
This will remain unresolved until we implement the
proposed solutions
and integrate blacklisting.
— For the time being, we will retain the current logout process unchanged.
Once blacklisting is implemented, the
request authentication
process will need to validate the
access token
against the blacklist table. If the token is found in the blacklist, it will be considered invalid.
There is a new integration test module as already discussed in section
The Test tests/test_jsonwebtoken.rs Module.
There is no new integration test added to existing modules.
Some common test code has been updated as a result of implementing
JSON Web Token.
It has been an interesting process for me as I delved into the world of
actix-web
adhoc middleware. While the code may seem simple at first glance, I encountered
some problems along the way and
sought assistance to overcome them.
I anticipated the problems, as described in
this section
and
this section,
before diving into the actual coding process. Despite the hurdles, I proceeded
with the implementation because I wanted to learn how to set a custom header
for all routes before their final response is sent to clients – that’s the
essence of adhoc middleware.
In a future post, I plan to implement the
proposed solutions
and explore the concept of blacklisting.
I hope you find this post informative and helpful. Thank you for reading.
And stay safe, as always.
Continuing with our actix-web learning application, we implement global extractor error handlers for both application/json and application/x-www-form-urlencoded data. This enhances the robustness of the code. Subsequently, we refactor the login data extraction process to leverage the global extractor error handlers.
The code we’re developing in this post is a continuation
of the code from the
eighth
post above. 🚀 To get the code of this
eighth
post, please use the following command:
— Please note, those marked with ★
are updated, and those marked with ☆ are new.
❷ Currently, the application does not handle extraction errors for both
application/json and application/x-www-form-urlencoded
data in data-related routes.
🚀 As a reminder, we have the following existing
data-related routes.
Briefly:
Route https://0.0.0.0:5000/data/employees
accepts application/json. For example
{"last_name": "%chi", "first_name": "%ak"}.
Route https://0.0.0.0:5000/ui/employees
accepts application/x-www-form-urlencoded. For
example last_name=%chi&first_name=%ak.
Unlike the data-related routes, the login route https://0.0.0.0:5000/api/login
currently implements a custom extractor that also handles extraction errors. Please refer
to the sections
Implementations of Routes /ui/login and /api/login
and
How the Email-Password Login Process Works
in previous posts for more details. 💥 We will refactor this implementation
to eliminate the custom extractor and fully leverage the global extractor error
handlers that we are going to implement.
Let’s demonstrate some unhandled extraction errors for both content types.
🚀 Please note that the
ajax_test.html
page is used in the examples below.
⓵ application/json content type. First, we make an invalid
submission with empty data. Then, we submit data with an invalid field
name:
The above screenshots indicate that there is some implicit default extraction
error handling in place: the response status code is 400 for
BAD REQUEST, and the response text contains the actual extraction
error message.
💥 However, this behavior is not consistent with the existing
implementation for the https://0.0.0.0:5000/api/login route, where
an extraction error always results in a JSON serialisation of
ApiStatus with a code of 400
for BAD REQUEST, and the message containing the exact extraction error.
For more details, refer to the current implementation of
pub fn extract_employee_login(body: &Bytes, content_type: &str) -> Result<EmployeeLogin, ApiStatus>
It’s worth noting that, as mentioned earlier,
we are also refactoring this custom extractor while retaining its current handling
of extraction errors.
⓶ application/x-www-form-urlencoded content type.
Similar to the previous example, we also submit two invalid
requests: one with empty data and another with data containing
an invalid field name:
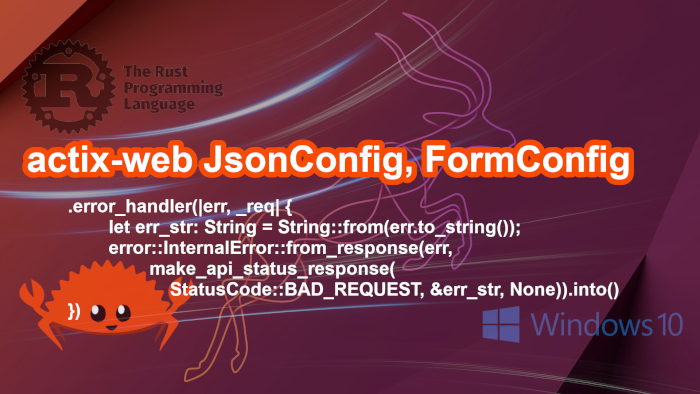
❸ Implementing “global extractor error handlers” for application/json
and application/x-www-form-urlencoded data.
This involves configuring extractor configurations provided by the
actix-web crate, namely
JsonConfig and
FormConfig, respectively.
We can define custom error handlers for each content type using their
error_handler(...) method.
In our context, we refer to these custom error handlers as
“global extractor error handlers”.
When an extraction error occurs, the response is a JSON serialisation of
ApiStatus. When a request to
route https://0.0.0.0:5000/ui/employees is successful,
the response is HTML. (As a reminder, we need to set
the request authorization header to something, for example,
chirstian.koblick.10004@gmail.com.)
❹ Integration tests for data-related routes.
To ensure that the global extractor error handlers function correctly, we need tests to verify their behavior.
In
tests/test_handlers.rs, we’ve
implemented four failed extraction tests, each ending with _error_empty
and _error_missing_field.
These tests closely resemble the examples shown previously. The code for the
new tests is similar to existing ones, so we won’t walk through it as they
are self-explanatory.
💥 In the new tests, take note of the error messages: "Content type error"
and "Content type error."!
This function is currently functional.
As mentioned previously,
we intend to refactor the code while retaining its extraction error handling behaviors,
which are now available automatically due to the introduction of
global extractor error handlers.
We are eliminating this helper function and instead using the
enum Either, which provides a mechanism
for trying two extractors:
a primary and a fallback.
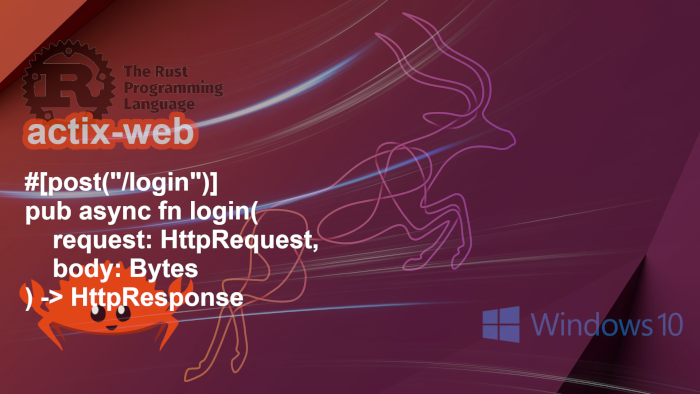
#[post("/login")]
pub async fn login(
    request: HttpRequest,
    app_state: web::Data<super::AppState>,
    body: Either<web::Json<EmployeeLogin>, web::Form<EmployeeLogin>>
) -> HttpResponse {
    let submitted_login  = match body {
        Either::Left(json) => json.into_inner(),
        Either::Right(form) => form.into_inner(),
    };
...
The last parameter and the return type have changed. The parameter
body is now an
enum Either, which is the focal
point of this refactoring. The extraction process is more elegant, and
we are taking advantage of a built-in feature, which should be well-tested.
The global extractor error handlers
enforce the same validations on the submitted data as the previous custom extractor
helper function.
Please note the previous return type of this function:
There are other minor changes throughout the function, but they are self-explanatory.
Let’s observe the refactored login code in action.
⓵ application/json content type. Two invalid requests and one valid request:
⓶ application/x-www-form-urlencoded content type.
Two invalid requests and one valid request:
⓷ application/x-www-form-urlencoded content type.
Using Postman.
Two invalid requests and one valid request:
⓸ application/x-www-form-urlencoded content type.
Using the application’s login page, first log in with an invalid email,
then log in again with a valid email and password.
❻ Integration tests for invalid login data.
These tests should have been written earlier, immediately after
completing the login functionalities.
In the test module,
tests/test_auth_handlers.rs, we’ve added four failed extraction
tests, denoted by functions ending with _error_empty and
_error_missing_field.
❼ We have reached the conclusion of this post. I don’t feel that implementing the
function extract_employee_login was a waste of time. Through this process,
I’ve gained valuable insights into Rust.
As for the next post for this project, I’m not yet sure what it will entail 😂… There
are still several functionalities I would like to implement. I’ll let my intuition guide
me in deciding the topic for the next post.
Thank you for reading, and I hope you find the information in this post useful. Stay safe,
as always.
Continuing with our actix-web learning application, we will discuss proper AJAX calls to ensure reliable functionality of CORS and session cookies. This also addresses issue ❷ raised in a previous post.
The code we’re developing in this post is a continuation
of the code from the
seventh
post above. 🚀 To get the code of this
seventh
post, please use the following command:
— Please note, those marked with ★
are updated, and those marked with ☆ are new.
❷ Session cookies.
I was working on CORS, session cookies, and AJAX calls when I realised
that we couldn’t get session cookies to work consistently across domains
for Firefox and other Chromium browsers
without HTTPS.
This realisation prompted the focus on enabling the application
to run under HTTPS, as discussed in the
seventh post: Rust: actix-web get SSL/HTTPS for localhost.
💥 However, despite running the application under HTTPS,
we later discovered that it still didn’t fully resolve the cookie issue.
This is because Chromium browsers are in the process of
phasing out third-party cookies.
While studying and experimenting with this issue, I made an observation
regarding the application’s allowed origin. The allowed origin
is set to http://localhost, as per
configuration.
During my experiments, I removed the http:// scheme,
leaving only localhost as the allowed origin:
As for why I made that change, I can’t recall the exact reason. It may have been due to some confusion while reading the documentation and examining examples from other sources.
According to the same-origin policy,
an origin is defined by its scheme,
host, and port.
You can find detailed rules for origin determination in the Wikipedia article
on the Same-origin policy.
Two resources are considered to be of the same origin if and only if all these values are exactly the same.
It seems logical, but it does not work when we log in using JSON with either an invalid email or password. The client tools simply report that the request could not be completed. I haven’t been able to work out why yet.
By “...log in using JSON...” I mean AJAX calls.
I do apologise for not being clear earlier.
After some study and experimentation, I have been able to determine the reasons:
AJAX requests must have both xhrFields.withCredentials
and crossDomain set to true.
How session cookies are created. We will discuss these in detail in the following sections.
⓵ AJAX and cross domain.
I use the HTML page
ajax_test.html
to test the application with AJAX calls. In the
sixth
post, I used the function
runAjaxEx(…),
which caused session cookies not to work properly when calls were cross-domain.
Now, I am using the function
runAjaxCrossDomain(…):
💥 Please note that I am still unclear why this is considered a
cross-domain case. I am accessing
ajax_test.html
via localhost, while the application is hosted at
localhost:5000. In the correct response screenshot below,
without the cross-domain setting, the response would be the login HTML page without the
Please check login detail. message because cookies are simply rejected:
As mentioned earlier, without HTTPS,
cookies do not function properly; they are rejected by Chromium browsers
and Firefox.
In this post, the cookie implementations are as follows:
Scheme: HTTPS://
Secure: true
SameSite: None
Let’s examine some examples where cookies are rejected.
1.
Scheme: HTTP://, Secure: false,
and SameSite: Strict.
When accessing
ajax_test.html
on localhost, and the application is hosted on the Ubuntu 22.10 machine at
192.168.0.16:5000, the
server-side per-request
cookies are rejected:
Some cookies are misusing the recommended “SameSite“ attribute

Cookie “original-content-type” has been rejected because it is in a cross-site context and its “SameSite” is “Lax” or “Strict”.

Cookie “redirect-message” has been rejected because it is in a cross-site context and its “SameSite” is “Lax” or “Strict”.

Cookie “redirect-message” has been rejected because it is in a cross-site context and its “SameSite” is “Lax” or “Strict”.

Cookie “original-content-type” has been rejected because it is in a cross-site context and its “SameSite” is “Lax” or “Strict”.

Cookie “redirect-message” has been rejected because it is in a cross-site context and its “SameSite” is “Lax” or “Strict”.

Cookie “original-content-type” has been rejected because it is in a cross-site context and its “SameSite” is “Lax” or “Strict”.
The warnings indicate that both Lax and Strict
would result in these cookies being rejected. The only remaining option left
is None.
For more information,
please refer to the following Mdm Web Docs article on
Set-Cookie SameSite.
2.
Scheme: HTTP://, Secure: false,
and SameSite: None.
The cookies are accepted, but there are still warnings regarding the
server-side per-request
cookies:
The warnings are:
Some cookies are misusing the recommended “SameSite“ attribute

Cookie “original-content-type” will be soon rejected because it has the “SameSite” attribute set to “None” without the “secure” attribute. To know more about the “SameSite“ attribute, read https://developer.mozilla.org/docs/Web/HTTP/Headers/Set-Cookie/SameSite

Cookie “redirect-message” will be soon rejected because it has the “SameSite” attribute set to “None” without the “secure” attribute. To know more about the “SameSite“ attribute, read https://developer.mozilla.org/docs/Web/HTTP/Headers/Set-Cookie/SameSite

Cookie “redirect-message” will be soon rejected because it has the “SameSite” attribute set to “None” without the “secure” attribute. To know more about the “SameSite“ attribute, read https://developer.mozilla.org/docs/Web/HTTP/Headers/Set-Cookie/SameSite

Cookie “original-content-type” will be soon rejected because it has the “SameSite” attribute set to “None” without the “secure” attribute. To know more about the “SameSite“ attribute, read https://developer.mozilla.org/docs/Web/HTTP/Headers/Set-Cookie/SameSite

Cookie “redirect-message” will be soon rejected because it has the “SameSite” attribute set to “None” without the “secure” attribute. To know more about the “SameSite“ attribute, read https://developer.mozilla.org/docs/Web/HTTP/Headers/Set-Cookie/SameSite login

Cookie “original-content-type” will be soon rejected because it has the “SameSite” attribute set to “None” without the “secure” attribute. To know more about the “SameSite“ attribute, read https://developer.mozilla.org/docs/Web/HTTP/Headers/Set-Cookie/SameSite
The application also maintains an application-wide publicly available cookie named
authorization cookie, discussed
toward the end of this section. This cookie stores the
access token
after a successful login. Based on the warnings above,
we would expect to receive the same warning for this cookie. And indeed, we do:
Generally, this is not a problem, as this
access token
is also included in the response’s
authorization header,
clients can get it from this header instead.
3.
Scheme: HTTP://, Secure: false,
and SameSite: None — as per in 2.
Chromium browsers, including Opera,
appear to reject cookies even when not accessed cross-domain.
For instance, when logging in with an invalid email, the login page
is displayed without the Please check login detail. message.
Now that the application can run under HTTPS://, let’s set
Secure to true and SameSite to
None and observe how browsers handle cookies.
❺ Scheme: HTTPS://, Secure:
true, and SameSite: None.
We need to make two changes to the cookie creation code.
To recap, all cookies now have Secure set to true,
and SameSite set to None. 💥 While this currently satisfies Chromium browsers, it comes
with a new warning. There’s no assurance that these cookies will continue to be
accepted in the future, as illustrated by the
Chrome example below.
⓵ Firefox does not show any cookie warnings, we
will not show any screenshots.
⓶ Opera accepts the
server-side per-request cookies.
Log in using an invalid email, we get the expected response:
⓷ Chrome also accepts the cookies, but shows a new warning:
The warning is:
Setting cookie in cross-site context will be blocked in future Chrome versions

Cookies with the SameSite=None; Secure and not Partitioned attributes that operate in cross-site contexts are third-party cookies. In future Chrome versions, setting third-party cookies will be blocked. This behavior protects user data from cross-site tracking.

Please refer to the article linked to learn more about preparing your site to avoid potential breakage.
We will briefly discuss this warning in the next section.
❻ Chromium is in the process of phasing out
of third-party cookies!
The article linked Chrome mentions in the warning is:
I have not read everything yet, but it does look very comprehensive,
listing a lot of alternatives to third-party cookies.
I can’t remember how, but I came across this Mdm Web Docs article titled
Cookies Having Independent Partitioned State (CHIPS)
before encountering the Chrome article mentioned above.
It explains Partitioned cookie. Subsequently, I reached out
to the authors of the relevant crates to inquire about this topic:
It appears that they are going to support this Partitioned cookie.
We’ll just have to wait and see how it pans out.
I haven’t delved into cookies for a while, and there have been changes. I feel
up-to-date with cookies now! 😂 It has been an interesting issue to study. I
hope you find the information in this post useful. Thank you for reading.
And stay safe, as always.
We are going to enable our actix-web learning application to run under HTTPS. As a result, we need to do some minor refactoring to existing integration tests. We also move and rename an existing module for better code organisation.
The code we’re developing in this post is a continuation
of the code from the
sixth
post above. 🚀 To get the code of this
sixth
post, please use the following command:
⓵ We have previously discussed its installation on both Windows 10 Pro
and Ubuntu 22.10 in
this section of another post.
⓶ 💥 On Windows 10 Pro, I have observed that, once we include the
openssl
crate, we should set the environment variable OPENSSL_DIR
at the system level, otherwise the
Rust Analyzer
Visual Studio Code plug-in would run into trouble.
The environment variable OPENSSL_DIR indicates
where OpenSSL has been installed. For example, C:\Program Files\OpenSSL-Win64.
Following are the steps to access Windows 10 Pro environment variable setting dialog.
Right click on This PC ➜ Properties
➜ Advance system settings (right hand side) ➜
Advanced tab ➜ Environment Variables…
button ➜ under System variables ➜ New…
➜ enter variable name and value in the dialog ➜ OK button.
The screenshot below is a brief visual representation of the above steps,
including the environment variable OPENSSL_DIR in place:
We might need to restart Visual Studio Code
to get the new setting recognised.
❹ Generate the self-signed encrypted private key and the certificate
files using the
OpenSSL Toolkit.
The OpenSSL command to generate the files will prompt a series
of questions. One important question is the Common Name
which is the server name or FQDN where the certificate
is going to be used. If we are not yet familiar with this process,
this
FQDN (Fully Qualified Domain Name): What It Is, Examples, and More
article would be an essential reading, in my humble opnion.
Be prepared, we will be asked the following questions:
Enter PEM pass pharse:

Country Name (2 letter code) [AU]:
State or Province Name (full name) [Some-State]:
Locality Name (eg, city) []: Melbourne
Organization Name (eg, company) [Internet Widgits Pty Ltd]:
Organizational Unit Name (eg, section) []:
Common Name (e.g. server FQDN or YOUR name) []:
Email Address []:

Please enter the following 'extra' attributes
to be sent with your certificate request

A challenge password []:
An optional company name []:
Both key-pass.pem and cert-pass.pem
are in the cert/ sub-directory as seen in
the Project Layout section.
💥 Please note I also use these two files on Windows 10 Pro to run
the application. It works, I am not sure why yet. I need to keep
an eye out for this.
We might get a warning of potential security risk... For example, see
the Firefox warning in the below screenshot:
I just ignore the warning and choose to go ahead. Even though
https:// works, but all mentioned browsers state
that the connection is not secure.
Please see Firefox, Chrome
and Opera sample screenshots below:
❻ We have to make changes to both integration tests common code
and actual test code.
I did run integration tests after making this change.
They failed. Base on the error messages, it seems that
reqwest::Client
should “have” the certificate as well (?).
I have tried to document all my observations during developing
these two helper functions. They are short and simple, I think
the inline documentation explains the code quite sufficiently.
— Initially, reqwest_client() does not include
.danger_accept_invalid_certs(true), resulting in a certificate error.
This solution,
provided in the following Stack Overflow thread titled
How to resolve a Rust Reqwest Error: Invalid Certificate
suggests adding .danger_accept_invalid_certs(true),
which appears to resolve the issue.
💥 Base on all evidences presented so far, including the
connection not secure warnings
reported by browsers and the need to call .danger_accept_invalid_certs(true)
when creating a
reqwest::Client
instance, it seems to suggest that
there may still be an issue with this implementation. Or is it common for a self-signed certificate, which is not issued by a trusted certificate authority, to encounter such problems?
However, having the application run under
https:// addresses issues I have had with cookies.
For now, I will leave it as is. We will discuss cookie in another new post.
❼ The final task of this post involves moving
src/utils.rs
to
src/bh_libs/australian_date.rs,
as it is a generic module, even though it depends on other third-party crates.
It is possible that this module will be moved elsewhere again.
❽ We’ve reached the end of this post. I’d like to mention that
I also followed the tutorial
How to Get SSL/HTTPS for Localhost.
I completed it successfully on Ubuntu 22.10, but browsers still warn about the connection not being secure. Perhaps this is to be expected with a self-signed certificate?
Overall, it’s been an interesting exercise. I hope you find the information
in this post useful. Thank you for reading. And stay safe, as always.
For our learning actix-web application, we are now adding two new features. ⓵ A simple email-password login with no session expiry. ⓶ A new middleware that manages request authentication using an access token “generated” by the login process. All five existing routes are now protected by this middleware: they can only be accessed if the request has a valid access token. With these two new features added, this application acts as both an application server and an API-like server or a service.
The code we’re developing in this post is a continuation
of the code from the
fifth
post above. 🚀 To get the code of this
fifth
post, please use the following command:
Let’s clarify the meanings of some glossary terms to facilitate the understanding of this post.
● An application server — the application functions as
a website server, serving interactive HTML pages and managing
states associated with client web sessions.
● An API-like server or a service — the application
operates as a data provider, verifying the validity of client requests.
Specifically, it checks for a valid access token
included in the request authorization header. If the requests are valid,
it proceeds to serve them.
● An access token — in this revision of the code,
any non-blank string is considered a valid access token!
Please note that this is a work in progress, and currently, login emails are
used as access tokens.
As such, we acknowledge that this so-called
access token
is relatively ineffective as a security measure.
The primary focus of this post is on the login and
request authentication
processes. Consider it a placeholder, as we plan to refactor it into a
more formal authentication method.
The response from the login process always includes the access token
in the authorization header implictly, and explictly in JSON responses.
Clients should store this access token for future use.
● An authenticated session — a client web session who has previously
logged in or authenticated. That is, having been given an
access token by the login process.
● Request authentication middleware — this is the new
middleware mentioned in the introduction, fully responsible for the
request authentication process.
● An authenticated request — a request which has passed the
request authentication process.
This post introduces several new modules and a new HTML home page, with some
modules receiving updates. The updated directory layout for the project is
listed below.
— Please note, those marked with ★
are updated, and those marked with ☆ are new.
The code has extensive documentation. It probably has more detail than in
this post, as documentation is specific to functionalities and implementation.
To view the code documentation, change to the project directory (where
Cargo.toml is located) and run the following command:
In the fifth
post, we introduced two new login-related routes, /ui/login and
/api/login, used them to demonstrate accepting request data in both
application/x-www-form-urlencoded and application/json formats.
In this post, we’ll fully implement a simple email and password login process with
no session expiry. In other words, if we can identify an employee by email, and the
submitted password matches the database password, then the session is considered
logged in or authenticated. The session remains
valid indefinitely, until the browser is shut down.
🚀 The handlers for /ui/login and /api/login
have the capability of conditionally return either HTML or JSON depending
on the content type of the original request.
❷ Protect all existing and new /data/xxx and /ui/xxx routes
(except /ui/login) using the new request authentication middleware as mentioned in the introduction.
This means only authenticated requests can access these routes.
Recall that we have the following five routes, which query the
database and return data in some form:
HTML response route http://0.0.0.0:5000/ui/employees/%chi/%ak —
method: GET.
HTML response route http://0.0.0.0:5000/helloemployee/%chi/%ak —
method: GET.
We implement protection, or request authentication,
around these routes, allowing only
authenticated sessions to access them. When a request is not authenticated,
it gets redirected to the /ui/login route. The handler for this route
uses the content type of the original request to determine whether it returns
the HTML login page with a user-friendly error message or an appropriate JSON error response.
It was generated using Argon2 Online by Esse.Tools, which is compatible with the
argon2
crate. Thus, we can use this crate to de-hash a hashed password to compare it to a plain text one.
The crate actix-session
will create a secured cookie named id.
However, since we’re only testing the application with HTTP (not
HTTPS), some browsers reject such secured cookie.
Since this is only a learning application, we’ll make all cookies
non-secured. Module
src/lib.rs
gets updated as follows:
We call the
builder(…) method
to access the
cookie_secure(…) method
and set the cookie id to non-secured.
❷ To handle potential request redirections during the login and
the
request authentication
processes, the application utilises the following server-side
per-request cookies: redirect-message
and original-content-type.
💥 Request redirection occurs when a request is redirected
to /ui/login due to some failure condition. When a request
gets redirected elsewhere, request redirection does not apply.
These cookies help persisting necessary information between requests. Between
requests refers to the original request that gets redirected, resulting in
the second and final independent request. Hence, per-request
pertains to the original request.
We implement a helper function to create these cookies in the module
src/helper/app_utils.rs:
Refer to the following Mdm Web Docs
Set-Cookie
for explanations of the settings used in the above function.
Take note of the call to the method
make_removal(…) —
it’s necessary to remove the server-side per-request cookies when
the request completes.
In addition to the aforementioned temporary cookies, the application
also maintains an application-wide publicly available cookie named
authorization. This cookie stores the
access token
after a successful login.
To recap, the application maintains three cookies. In the module
src/helper/app_utils.rs,
we also implement three pairs of helper methods,
build_xxx_cookie(...) and remove_xxx_cookie(...),
to help manage the lifetime of these cookies.
All HTTP responses — successful and failure, HTML and JSON —
have their HTTP response status code set to an appropriate
code. In addition, if a response is in JSON format, the
field
ApiStatus.code
also has its value sets to the value of the HTTP response status
code.
— We’ve introduced
ApiStatus in the
fifth
post. Basically, it’s a generic API status response that gets
included in all JSON responses.
👎 This is the area where I encountered the most difficulties while learning
actix-web
and actix-web middleware. Initially,
I thought both the login and the request authentication
processes should be in the same middleware. I attempted that approach, but it was unsuccessful.
Eventually, I realised that login should be handled by an endpoint handler function. And
request authentication should be managed
by the middleware. In this context, the middleware is much like a Python decorator.
The email-password login process exclusively occurs in module
src/auth_handlers.rs.
In broad terms, this process involves two routes /api/login and /ui/login.
⓵ Attempt to extract the submitted log in information, a step discussed the
fifth
post above. If the extraction fails, it always returns a JSON response
of ApiStatus with a code
of 400 for BAD REQUEST. And that’s the end of the request.
● If the request content type is application/json,
we return a JSON response of
ApiStatus with a code
of 401 for UNAUTHORIZED. The value for the
message field is set to the value of the parameter message.
● For the application/x-www-form-urlencoded content type,
we set the server-side per-request cookie redirect-message
and redirect to route /ui/login:
...
        HttpResponse::Ok()
            .status(StatusCode::SEE_OTHER)
            .append_header((header::LOCATION, "/ui/login"))
            // Note this per-request server-side only cookie.
            .cookie(build_login_redirect_cookie(&request, message))
            .finish()
...
...
    // TO_DO: Work in progress -- future implementations will formalise access token.
    let access_token = &selected_login.email;

    // https://docs.rs/actix-identity/latest/actix_identity/
    // Attach a verified user identity to the active session
    Identity::login(&request.extensions(), String::from(access_token)).unwrap();

    // The request content type is "application/x-www-form-urlencoded", returns the home page.
    if request.content_type() == ContentType::form_url_encoded().to_string() {
        Either::Right( HttpResponse::Ok()
            // Note this header.
            .append_header((header::AUTHORIZATION, String::from(access_token)))
            // Note this client-side cookie.
            .cookie(build_authorization_cookie(&request, access_token))
            .content_type(ContentType::html())
            .body(render_home_page(&request))
        )
    }
    else {
        // The request content type is "application/json", returns a JSON content of
        // LoginSuccessResponse.
        //
        // Token field is the access token which the users need to include in the future
        // requests to get authenticated and hence access to protected resources.
        Either::Right( HttpResponse::Ok()
            // Note this header.
            .append_header((header::AUTHORIZATION, String::from(access_token)))
            // Note this client-side cookie.
            .cookie(build_authorization_cookie(&request, access_token))
            .content_type(ContentType::json())
            .body(login_success_json_response(&selected_login.email, &access_token))
        )
    }
...
● The access_token
is a work in progress. The main focus of this post is on the login and the
request authentication
processes. Setting the access_token
to just the email is sufficient to get the entire process working, helping us understand
how everything comes together better. We’ll refactor this to a more formal type of
authentication later.
● The line Identity::login(&request.extensions(), String::from(access_token)).unwrap();
is taken directly from the actix-identity crate. I believe this
allows the application to operate as an application server.
● 🚀 Note that for all responses, the
access_token
is set in both the authorization header and the
authorization cookie. This is intended for clients usage,
for example, in JavaScript. Clients have the option to extract and store this
access_token
for later use.
● 💥 Take note of this authorization header. It is
only available to clients, for example, in JavaScript. The
request authentication middleware
also attempts to extract the
access_token
from this header,
as explained earlier.
This header is set explicitly by clients
when making requests. While, at this point, it is a response header,
and therefore, it will not be available again in later requests unless explicitly set.
And, finally:
● If the content type is application/x-www-form-urlencoded,
we return the HTML home page as is.
● If the content type is application/json,
we return a JSON serialisation of
LoginSuccessResponse.
This route can be accessed in the following three ways:
⓵ Direct access from the browser address bar, the login page HTML gets served
as is. This is a common use case. The request content type is blank.
⓶ Redirected to by the login process handler as
already discussed.
It should be apparent that when this handler is called,
the server-side per-request cookie redirect-message
has already been set. The presence of this cookie signifies that
this handler is called after a fail login attempt. The value
of the redirect-message cookie is included in the
final response, and the HTTP response code is set to 401
for UNAUTHORIZED.
In this scenario, the request content type is available throughout the call stack.
Always creates the server-side per-requestoriginal-content-type
cookie, with its value being the original request content type.
If it redirects to /ui/login, then creates the
server-side per-requestredirect-message
cookie with a value set to the constant
UNAUTHORISED_ACCESS_MSG.
...
    let mut content_type: String = String::from(request.content_type());
    let mut status_code = StatusCode::OK;
    let mut message = String::from("");

    // Always checks for cookie REDIRECT_MESSAGE.
    if let Some(cookie) = request.cookie(REDIRECT_MESSAGE) {
        message = String::from(cookie.value());
        status_code = StatusCode::UNAUTHORIZED;

        if let Some(cookie) = request.cookie(ORIGINAL_CONTENT_TYPE) {
            if content_type.len() == 0 {
                content_type = String::from(cookie.value());
            }
        }
    }
...
From
section ⓶
and
section ⓷,
it should be clear that the presence of the
server-side per-requestredirect-message cookie
indicates a redirect access. If the request content type is not
available, we attempt to retrieve it from the server-side per-requestoriginal-content-type cookie.
Finally, it delivers the response based on the content type and removes
both the redirect-message and original-content-type
cookies. Note on the following code:
The essential logic of this new middleware is to determine if a request is from an
authenticated session,
and then either pass the request through or redirect to an appropriate route.
This logic can be described by the following pseudocode:
Requests to “/favicon.ico” should proceed.

When Logged In
--------------

1. Requests to the routes “/ui/login” and “/api/login”
   are redirected to the route “/ui/home”.

2. Requests to any other routes should proceed.

When Not Logged In
------------------

1. Requests to the routes “/ui/login” and “/api/login”
   should proceed.

2. Requests to any other route are redirected to
   the route “/ui/login”.
This logic should cover all future routes. Since this middleware is registered last,
it means that all existing routes
and potential future routes are protected by this middleware.
A pair of helper functions discribed below is responsible for managing the
request authentication process.
As discussed earlier,
this closure also creates the server-side per-requestoriginal-content-type cookie. This cookie is so obscured.
To help addressing the obscurities,
the helper method that creates this cookie comes
with extensive documentation explaining all scenarios where this cookie is
required.
The
home page HTML
itself is also simple,
without any CSS. It features a Logout button and other buttons
whose event handler methods simply call the existing routes
using AJAX, displaying responses in plain JavaScript dialogs.
The AJAX function, runAjaxEx(...), used by the home page, is also available
on GitHub. It makes references to some
Bootstrap
CSS classes, but that should not be a problem for this example.
Test and tests in this section
mean integration test and integration tests,
respectively.
Code has changed. Existing tests and some common test code must be
updated. New tests are added to test new functionalities.
The application now uses cookies, all tests must enable cookie
usage. We’ll also cover this in a later section.
❶ Common test code.
Now that an access_token
is required to access protected routes. To log in every time to test is not
always appropriate. We want to ensure that the code can extract the
access_token
from the authorization header.
I did look into the setup and tear down
test setup in Rust. The intention is, in setup
we’ll do a login, remember the
access_token
and use it in proper tests. In tear down, we
log out. But this seems troublesome in Rust. I gave up
on this idea.
💥 We’ve settled on a compromise for this code revision: we will
implement a method that returns a hard-coded
access_token.
As we proceed with the authentication refactoring, we’ll also update
this method accordingly.
In the
third post,
we’ve incorporated tests following the approach outlined by Luca Palmieri
in the 59-page sample extract of his book
ZERO TO PRODUCTION IN RUST.
Continuing with this approach, we’ll define a simple TestApp in
tests/common.rs:
And spawn_app() now returns an instance of TestApp.
We can then call the method mock_access_token() on this instance
to use the hard-coded access_token.
❷ Enble cookies in tests.
We use the
reqwest
crate to send requests to the application. To enable cookies,
we create a client using the
builder method
and chain to
cookie_store(true):
    let client = reqwest::Client::builder()
        .cookie_store(true)
        .build()
        .unwrap();
❸ Existing tests.
All existing tests in
tests/test_handlers.rs
must be updated as outlined above, for example:
async fn get_helloemployee_has_data() {
    let test_app = &spawn_app().await;

    let client = reqwest::Client::builder()
        .cookie_store(true)
        .build()
        .unwrap();

    let response = client
        .get(make_full_url(&test_app.app_url, "/helloemployee/%chi/%ak"))
        .header(header::AUTHORIZATION, &test_app.mock_access_token())
        .send()
        .await
        .expect("Failed to execute request.");

    assert_eq!(response.status(), StatusCode::OK);

    let res = response.text().await;
    assert!(res.is_ok(), "Should have a HTML response.");

    // This should now always succeed.
    if let Ok(html) = res {
        assert!(html.contains("Hi first employee found"), "HTML response error.");
    }
}
❹ New tests.
⓵ We have a new test module,
tests/test_auth_handlers.rs,
exclusively for testing the newly added authentication routes. There are a total of
eleven tests, with eight dedicated to login and six focused on accessing
existing protected routes without the authorization header set.
⓶ In the existing test module,
tests/test_handlers.rs, we’ve added
six more tests. These tests focused on accessing existing protected routes without
the authorization header set. These test functions ended with
_no_access_token.
These new tests should be self-explanatory. We will not go into detail.
The gallery below shows the home page, and responses from some of the routes:
❷ While logged in, enter http://192.168.0.16:5000/data/employees/%chi/%ak
in the browser address bar, we get the JSON response as expected:
Next, enter http://192.168.0.16:5000/ui/login directly
in the browser address bar. This should bring us back to the home page.
❸ While not logged in,
enter http://192.168.0.16:5000/data/employees/%chi/%ak
directly in the browser address bar. This redirects us to the login
page with an appropriate message:
❹ Attempt to log in with an incorrect email and/or password:
❺ Access the JSON response route http://192.168.0.16:5000/data/employees
with the authorization header. This usage demonstrate the application
as an API-like server or a
service:
❻ Access http://192.168.0.16:5000/data/employees/%chi/%ak
without the authorization header.
While the successful response is in JSON, the request lacks a content type.
Request authentication
fails, the response is the HTML login page
❼ Access the same http://192.168.0.16:5000/data/employees/%chi/%ak
with the authorization header. This should result in a successful
JSON response as expected:
It seems logical, but it does not work when we log in using JSON
with either an invalid email or password. The client tools simply
report that the request could not be completed. I haven’t been able
to work out why yet.
I do apologise that this post is a bit too long. I can’t help
it. I include all the details which I think are relevant. It has taken
nearly two months for me to arrive at this point in the code. It is a
significant learning progress for me.
We haven’t completed this project yet. I have several other objectives in
mind. While I’m unsure about the content of the next post for this project,
there will be one.
Thank you for reading. I hope you find this post useful. Stay safe, as always.
We’re implementing a login process for our actix-web learning application. We undertake some general updates to get ready to support login. We then implement a new /api/login route, which supports both application/x-www-form-urlencoded and application/json content types. In this post, we only implement deserialising the submitted request data, then echo some response. We also add a login page via route /ui/login.
The code we’re developing in this post is a continuation
of the code from the
fourth
post above. 🚀 To get the code of this
fourth
post, please use the following command:
As already mentioned in the introduction above, in this post,
our main focus of the login process is deserialising both
application/x-www-form-urlencoded and
application/json into a struct ready
to support login. I struggle with this issue a little, I document
it as part of my Rust learning journey.
This post introduces a few new modules, some MySQL migration scripts,
and a new login HTML page. The updated directory layout for the project
is in the screenshot below:
While inside the new directory migrations/mysql/,
see project directory layout
above, create empty migration files
99999999999999_emp_email_pwd.up.sql and
99999999999999_emp_email_pwd.down.sql
using the command:
Populate the two script files with what we would like to
do. Please see their contents
on GitHub.
To apply, run the below command, it’ll take a little while to complete:
❸ Update
src/models.rs
to manage new fields
employees.email and employees.password.
If we run cargo test now, all integration tests
should fail. All integration tests eventually call to
get_employees(...), which does a
select * from employees.... Since the two new
fields’ve been added to a specific order, field indexes in
get_employees(...) are out of order.
pub async fn get_employees(...) updated to read
Employee.email field. Other fields’ indexes also get updated.
New pub struct EmployeeLogin.
New pub async fn select_employee(...), which
optionally selects an employee base on exact email match.
New pub struct LoginSuccess.
Add "email": "siamak.bernardeschi.67115@gmail.com"
to existing tests.
Please see the
updated src/models.rs on
GitHub. The documentation should be sufficient to help reading the code.
❹ New module
src/auth_handlers.rs,
where new login routes /ui/login and
/api/login are implemented.
● http://0.0.0.0:5000/ui/login is a GET
route, which just returns the login.html page as HTML.
● http://0.0.0.0:5000/api/login is a POST route.
This is effectively the application login handler.
💥 This http://0.0.0.0:5000/api/login route is the main focus
of this post:
— Its handler method accepts both application/x-www-form-urlencoded
and application/json content types, and deserialises the byte stream
to struct EmployeeLoginmentioned above.
💥
Please also note that, as already mentioned, in this post,
the login process does not do login,
if successfully deserialised the submitted data, it’d just echo a
confirmation response in the format of the request content type.
If failed to deserialise, it’d send back a JSON response which
has an error code and a text message.
Examples of valid submitted data for each content type:
These’re the essential details of the code. The rest is fairly straightforward,
and there’s also sufficient documentation to aid the reading of the code.
💥 Please also note that there’re also some more new modules, such as
src/bh_libs/api_status.rs
and
src/helper/messages.rs,
they’re very small, self-explanatory and have sufficient documentation
where appropriate.
❺ Register new login routes /ui/login and
/api/login.
Please note, this login page has only HTML. There is no CSS at all.
It looks like a dog’s breakfast, but it does work. There is no client-side
validations either.
The Login button POSTs login requests to
http://0.0.0.0:5000/api/login, the content type then
is application/x-www-form-urlencoded.
For application/json content type, we can use
Testfully.
(We could also write our own AJAX requests to test.)
❼ As this is not yet the final version of the login process,
we’re not writing any integration tests for it yet. We’ll do
so in due course…
⓵ For the time being, we’ve written some new code and
their associated unit tests. We have also written
some documentation examples. The full test with the command
cargo test should have all tests pass.
⓶ Manual tests of the new routes.
In the following two successful tests, I run the application server
on an Ubuntu 22.10 machine, and run both the login page and
Testfully
on Windows 10.
Test application/x-www-form-urlencoded submission
via login page:
In this failure test, I run the application server
and
Testfully
on Windows 10. The submitted application/json data
does not have an email field:
It’s been an interesting exercise for me. My understanding of Rust’s
improved a little. I hope you find the information in this post useful.
Thank you for reading and stay safe as always.
I’ve been studying user authentication with the actix-web framework. It seems that a popular choice is to use crate actix-identity, which requires crate actix-session. To add these two (2) crates, the code of the existing application must be refactored a little. We first look at code refactoring and integration. Then we briefly discuss the official examples given in the documentation of the 2 (two) mentioned crates.
The code we’re developing in this post is a continuation
of the code from the
third
post above. 🚀 To get the code of this
third
post, please use the following command:
The session storage backend we use with
actix-session is
RedisSessionStore,
it requires Redis server. We use the Redis Official Docker Image as discussed in the
following post:
This makes instantiating a required instance of
RedisSessionStore
impossible for me! “Impossible for me” because I tried
and could not get it to work. I won’t list out what I’ve tried, it’d be
a waste of time.
The next best option is to refactor it to async, and
follow the official documentations to register
IdentityMiddleware
and
SessionMiddleware.
Updated src/lib.rs:
pub async fn run(listener: TcpListener) -> Result<Server, std::io::Error> {
    ...

    let pool = database::get_mysql_pool(config.max_connections, &config.database_url).await;

    let secret_key = Key::generate();
    let redis_store = RedisSessionStore::new("redis://127.0.0.1:6379")
        .await
        .unwrap();

    let server = HttpServer::new(move || {
        ...

        App::new()
            .app_data(web::Data::new(AppState {
                db: pool.clone()
            }))
            .wrap(IdentityMiddleware::default())
            .wrap(SessionMiddleware::new(
                    redis_store.clone(),
                    secret_key.clone()
            ))
            .wrap(cors)

            ...
    })
    .listen(listener)?
    .run();

    Ok(server)
}
💥 Please note the following:
The two (2) new middleware get registered before the existing
Cors middleware,
(i.e., .wrap(cors)). Recall from the
actix-web middleware
documenation that
middleware get called in reverse order of registration,
we want the
Cors middleware
to run first to reject invalid requests at an early stage.
Now that run(...) is an async
function, we can call .await on database::get_mysql_pool(...)
instead of wrap it in the
async_std::task::block_on
function.
Apart from the above refactorings, nothing else has been changed.
All functions who call run(...) must also be refactored
now that run(...) is an async function.
They are main(), spawn_app() and all integration
test methods which call spawn_app().
❸ Update function main().
Updated src/main.rs:
...
#[actix_web::main]
async fn main() -> Result<(), std::io::Error> {
    ...

    let server = run(listener).await.unwrap();
    server.await
}
Note, the code in the previous version:
    ...
    run(listener)?.await
❹ Update function spawn_app().
Updated tests/common.rs:
pub async fn spawn_app() -> String {
    ...
    let server = run(listener).await.unwrap();
    let _ = tokio::spawn(server);
    ...
}
Note, the code in the previous version:
    ...
    let server = run(listener).expect("Failed to create server");
    let _ = tokio::spawn(server);
    ...
❺ Accordingly, in tests/test_handlers.rs all calls to
spawn_app() updated to let root_url = &spawn_app().await;.
tests/test_handlers.rs with get_helloemployee_has_data() updated:
In src/handlers.rs, endpoint handler methods are async,
and so where get_employees(...) gets called, chain .await
to it instead of wrapping it in the
async_std::task::block_on
function — which does not make any sense!
⓶ In modules src/database.rs and src/models.rs,
the documentations now have both synchronous and asynchronous examples where
appropriate.
For each crate, I try out two (2) examples as listed in the documentations:
one using cookie and one using Redis. I start off using
Testfully
as the client, and none works! And they are short and easy to understand examples!
Then I try using browsers. This also involves writing a simple HTML page.
All examples work in browsers.
The actual example code I put together from the examples listed in
the document page:
#[actix_web::main]
async fn main() -> std::io::Result<()> {
    let secret_key = Key::generate();
    let redis_store = RedisSessionStore::new("redis://127.0.0.1:6379")
        .await
        .unwrap();

    HttpServer::new(move || {
        App::new()
            // Install the identity framework first.
            .wrap(IdentityMiddleware::default())
            // The identity system is built on top of sessions. You must install the session
            // middleware to leverage `actix-identity`. The session middleware must be mounted
            // AFTER the identity middleware: `actix-web` invokes middleware in the OPPOSITE
            // order of registration when it receives an incoming request.
            .wrap(SessionMiddleware::new(
                 redis_store.clone(),
                 secret_key.clone()
            ))
            .service(index)
            .service(login)
            .service(logout)
    })
    .bind(("0.0.0.0", 8080))?
    .run()
    .await
}

#[get("/")]
async fn index(user: Option<Identity>) -> impl Responder {
    if let Some(user) = user {
        format!("Welcome! {}", user.id().unwrap())
    } else {
        "Welcome Anonymous!".to_owned()
    }
}

#[post("/login")]
async fn login(request: HttpRequest) -> impl Responder {
    // Some kind of authentication should happen here
    // e.g. password-based, biometric, etc.
    // [...]

    let token = String::from("test");

    // attach a verified user identity to the active session
    Identity::login(&request.extensions(), token.into()).unwrap();

    HttpResponse::Ok()
}

#[post("/logout")]
async fn logout(user: Identity) -> impl Responder {
    user.logout();
    HttpResponse::Ok()
}
Both the above two examples can be tested using the following HTML page:
Having been able to integrate these two (2) crates is a small
step toward the authentication functionality which I’d like to
build as a part of this learning application.
I write this post primarily just a record of what I’ve learned. I hope
you somehow find the information helpful. Thank you for reading and stay
safe as always.