❶ Let’s cover Windows 10 first, since it is simpler.
-
Go to https://www.python.org/downloads/windows/ and download the
appropriate installer for your Windows 10 machine, such as
python-3.12.4-amd64.exe. -
Run the installer as an Administrator. Choose the custom installation
option to install it to
C:\PF\Python312\.
Please note that the C:\PF\Python312\Scripts\ directory now
contains only the following executables: pip.exe, pip3.12.exe
and pip3.exe. The executable virtualenv.exe is no longer
included.
To create a virtual environment (venv) for Python 3.12.4,
use the following command:
C:\PF\Python312\python.exe -m venv venv
❷ On Ubuntu 22.10, I succeeded the first time, but I just did not know where it was installed 😂.
On June 25, 2022, I installed Python 3.9 Beta on a non-Ubuntu Linux. Please refer to this post: Synology DS218: preparing Python 3.9 Beta compelete development environment. That was the only time I installed Python on a Linux system.
For Python 3.12.4, it appears we need to install it from the source code, as indicated on this download page.
I followed the instructions in the section “Method 2: Install Python From Source Code” from the post How to Install Python 3 on Ubuntu 20.04 or 22.04.
My steps are as follows:
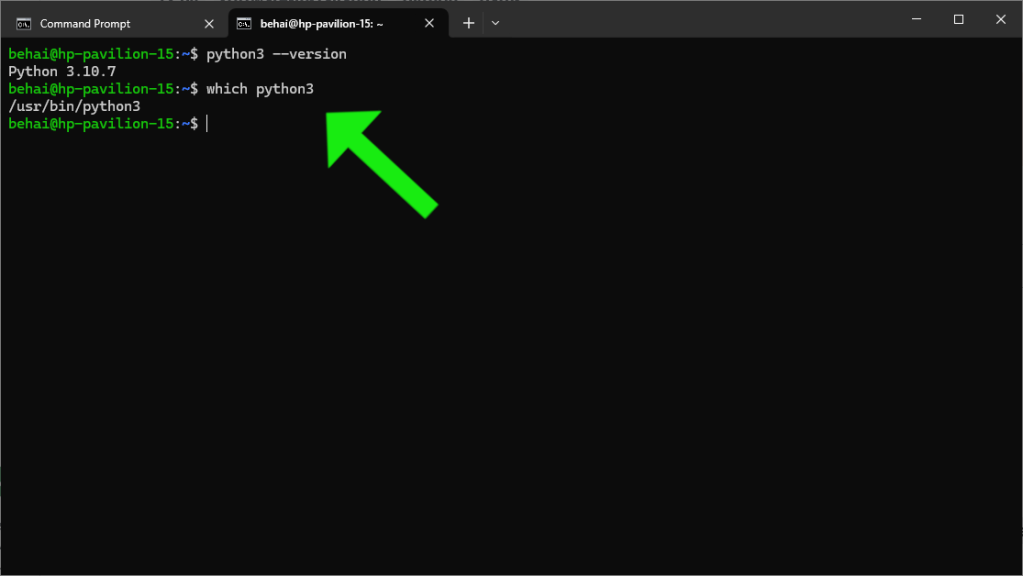
⓵ Checking the currently active Python version and its installation path using the following commands:
python3 --version
which python3
Please refer to the illustration in the screenshot below:

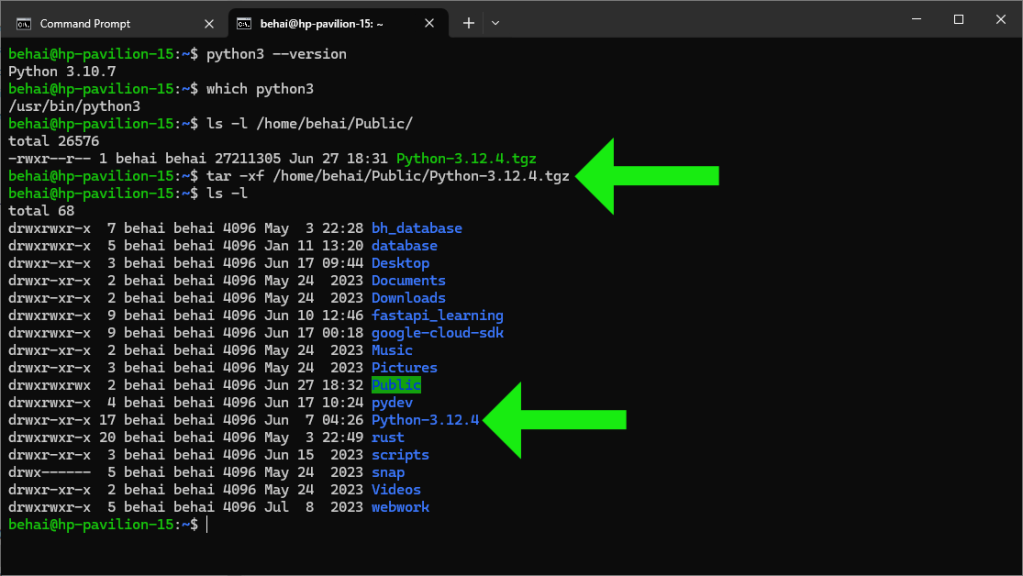
⓶ Download Python-3.12.4.tgz to /home/behai/Public/.
⓷ Extract the compressed files using the following command:
tar -xf /home/behai/Public/Python-3.12.4.tgz
The files are extracted to /home/behai/Python-3.12.4/.
Please see the screenshot illustration below:

⓸ Change to the directory /home/behai/Python-3.12.4/.
The command is:
behai@hp-pavilion-15:~$ cd Python-3.12.4/
⓹ Test system and optimise Python. The command is:
behai@hp-pavilion-15:~/Python-3.12.4$ ./configure --enable-optimizations
This command produces a long output and takes a few minutes to complete. I did not encounter any problems.
⓺ Finally, install Python 3.12.4. As stated in the introduction, I want this version to be an additional installation, so the command is:
behai@hp-pavilion-15:~/Python-3.12.4$ sudo make altinstall
It took nearly 20 minutes to complete, with a very long output. No errors were reported.
💥 I would like to point out that I had some vague ideas about what the above steps do: they compile and build the Python interpreter from the source. However, I did not know where Python 3.12.4 was installed. From the output, I knew the installation was successful, but I was unsure of the installation path for Python 3.12.4.
⓻ Verify Python version. I reran the first command from Step 1:
python3 --version
I was unsure, but I was expecting Python 3.10.7. And it is.
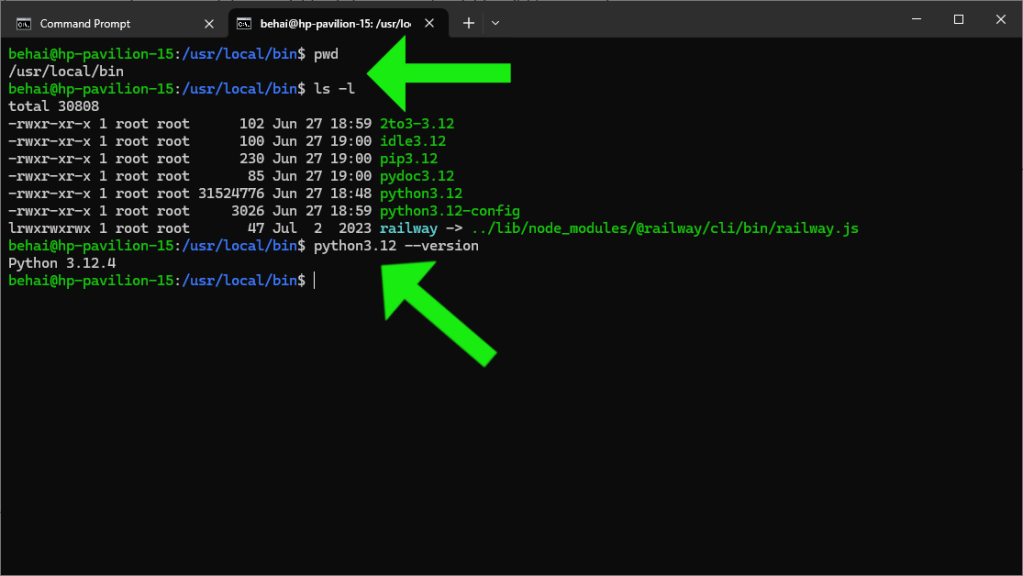
⓼ 🐍 Python 3.12.4’s path is /usr/local/bin/python3.12.
After some searching, I came across this page https://docs.python.org/3/using/unix.html#building-python, which discusses installing Python from source code. This page led me to this section https://docs.python.org/3/using/configure.html#cmdoption-prefix.
These two pages effectively point out that the default installation location
for the command make altinstall is /usr/local.
I have been able to verify that. Please see the screenshot illustration below:

To create a virtual environment (venv) for Python 3.12.4,
use the following command:
behai@hp-pavilion-15:~/fastapi$ /usr/local/bin/python3.12 -m venv venv
🚀 Before writing this post, I tested the Python 3.12.4 installation by creating
a virtual environment (venv) and running a web server application
from this venv.
The installation of Python 3.12.4 as an additional interpreter on Ubuntu 22.10 and Windows 10 appears to be in working order.
Thank you for reading. I hope you find the information in this post useful. Stay safe, as always.
✿✿✿
Feature image source:


