Installing Python 3.12.4 as an Additional Interpreter on Ubuntu 22.10 and Windows 10

We describe the steps to install Python 3.12.4 as an additional interpreter on both Windows 10 and Ubuntu 22.10. This installation will add Python 3.12.4 while keeping the existing installations of other Python versions intact.

❶ Let’s cover Windows 10 first, since it is simpler.

  1. Go to https://www.python.org/downloads/windows/ and download the appropriate installer for your Windows 10 machine, such as python-3.12.4-amd64.exe.
  2. Run the installer as an Administrator. Choose the custom installation option to install it to C:\PF\Python312\.

Please note that the C:\PF\Python312\Scripts\ directory now contains only the following executables: pip.exe, pip3.12.exe and pip3.exe. The executable virtualenv.exe is no longer included.

To create a virtual environment (venv) for Python 3.12.4, use the following command:

C:\PF\Python312\python.exe -m venv venv

❷ On Ubuntu 22.10, I succeeded the first time, but I just did not know where it was installed 😂.

On June 25, 2022, I installed Python 3.9 Beta on a non-Ubuntu Linux. Please refer to this post: Synology DS218: preparing Python 3.9 Beta compelete development environment. That was the only time I installed Python on a Linux system.

For Python 3.12.4, it appears we need to install it from the source code, as indicated on this download page.

I followed the instructions in the section “Method 2: Install Python From Source Code” from the post How to Install Python 3 on Ubuntu 20.04 or 22.04.

My steps are as follows:

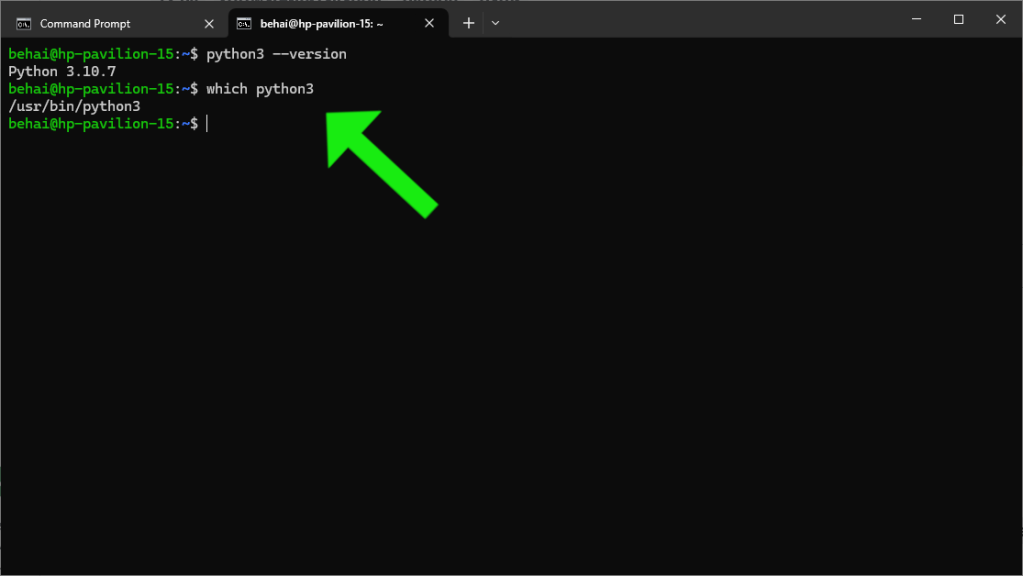
⓵ Checking the currently active Python version and its installation path using the following commands:

python3 --version
which python3

Please refer to the illustration in the screenshot below:

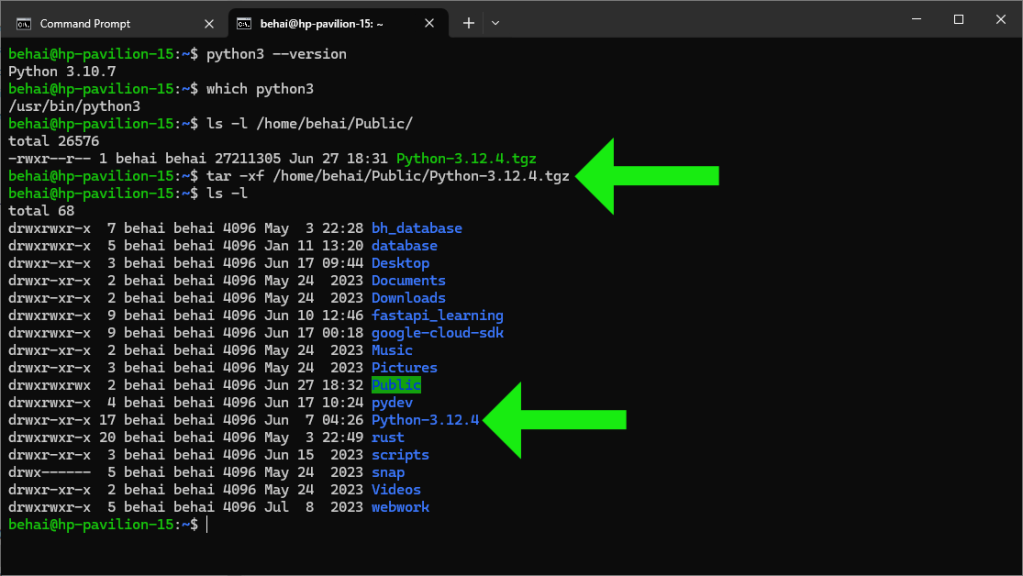
⓶ Download Python-3.12.4.tgz to /home/behai/Public/.

⓷ Extract the compressed files using the following command:

tar -xf /home/behai/Public/Python-3.12.4.tgz

The files are extracted to /home/behai/Python-3.12.4/. Please see the screenshot illustration below:

⓸ Change to the directory /home/behai/Python-3.12.4/. The command is:

behai@hp-pavilion-15:~$ cd Python-3.12.4/

⓹ Test system and optimise Python. The command is:

behai@hp-pavilion-15:~/Python-3.12.4$ ./configure --enable-optimizations

This command produces a long output and takes a few minutes to complete. I did not encounter any problems.

⓺ Finally, install Python 3.12.4. As stated in the introduction, I want this version to be an additional installation, so the command is:

behai@hp-pavilion-15:~/Python-3.12.4$ sudo make altinstall

It took nearly 20 minutes to complete, with a very long output. No errors were reported.

💥 I would like to point out that I had some vague ideas about what the above steps do: they compile and build the Python interpreter from the source. However, I did not know where Python 3.12.4 was installed. From the output, I knew the installation was successful, but I was unsure of the installation path for Python 3.12.4.

⓻ Verify Python version. I reran the first command from Step 1:

python3 --version

I was unsure, but I was expecting Python 3.10.7. And it is.

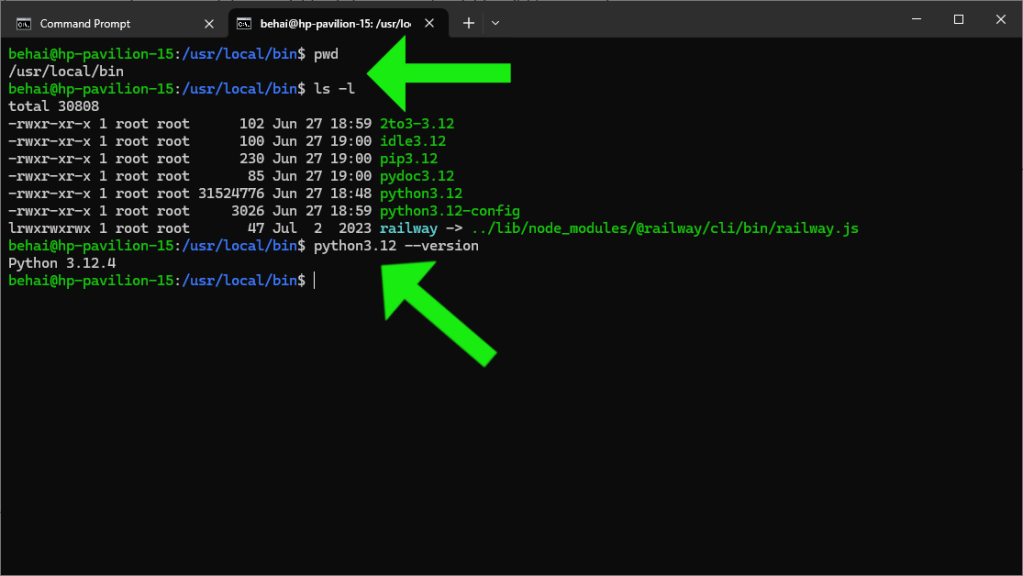
⓼ 🐍 Python 3.12.4’s path is /usr/local/bin/python3.12.

After some searching, I came across this page https://docs.python.org/3/using/unix.html#building-python, which discusses installing Python from source code. This page led me to this section https://docs.python.org/3/using/configure.html#cmdoption-prefix.

These two pages effectively point out that the default installation location for the command make altinstall is /usr/local. I have been able to verify that. Please see the screenshot illustration below:

To create a virtual environment (venv) for Python 3.12.4, use the following command:

behai@hp-pavilion-15:~/fastapi$ /usr/local/bin/python3.12 -m venv venv

🚀 Before writing this post, I tested the Python 3.12.4 installation by creating a virtual environment (venv) and running a web server application from this venv.

The installation of Python 3.12.4 as an additional interpreter on Ubuntu 22.10 and Windows 10 appears to be in working order.

Thank you for reading. I hope you find the information in this post useful. Stay safe, as always.

✿✿✿

Feature image source:

Python: Application ( Self ) Installation, Built Distribution and Test the Built Distribution.

In this post, we discuss how to make an application self-installable in editable or development mode; and then prepare it for distribution. Finally, test the distribution in another virtual environment.

For a Python application, we can install required packages individually or via the requirements.txt text file. We can also use the setuptools package to make applications install packages in editable or development mode; and later use wheel to prepare the application built distribution.

In this post, we demonstrate how to do this with a simple Flask web application that has only a single route /hello. We will then install the application built distribution onto another virtual environment and run the application with Waitress web server — https://docs.pylonsproject.org/projects/waitress/en/latest/.

Environments

  1. Python 3.10.1.

Application Directories and Files

These are the directories and files that we will create manually:

F:\self_install\
|
|-- .env
|-- app.py
|-- setup.py
|
|-- src\
|   |
|   |-- self_install\
|       |   
|       |-- __init__.py
|       |-- config.py

Please note, this is my environment only, you can name it whatever you like and where ever suit you most.

Create The Application

Setting up the virtual environment

Change directory to F:\self_install\, and run the following three ( 3 ) commands to set up the virtual environment:

C:\PF\Python310\python.exe -m pip install --upgrade pip

C:\PF\Python310\python.exe -m pip install --user virtualenv 

C:\Users\behai\AppData\Roaming\Python\Python310\Scripts\virtualenv.exe venv

Then activate the virtual environment:

.\venv\Scripts\activate.bat

For creating virtual environment, please see Python: Virtual Environment virtualenv for multiple Python versions.

The screen should now look similar to the image below:

setuptools and wheel

After activating venv, install and upgrade setuptools and wheel, run the following command:

.\venv\Scripts\pip.exe install --upgrade setuptools wheel

The output should look similar to the image below:

We should take a glance inside F:\self_install\venv\Lib\site-packages\, and make mental notes of what are in there.

F:\self_install\setup.py

Below are the relevant documentations:

The file setup.py is used to install the application, and via wheel prepare the built distribution.

File F:\self_install\setup.py:
"""Installation script for self_install demo project."""
from pathlib import Path
from setuptools import setup, find_packages

setup(
    name='self-install',
    description='Demonstrate project self installation through pip.',
    version='1.0.0',
    author='Van Be Hai Nguyen',
    author_email='behai_nguyen@hotmail.com',
    packages=find_packages(where="src"),
    package_dir={"": "src"},
    python_requires='>=3.10',
    install_requires=[
        'Flask',
        'python-dotenv',
    ],
)

python-dotenv is required to read .env enviroment file. A further note, this setup requires sub-directory src\ exists under F:\self_install\ before we can run the installation.

Install the Application

To install the application in editable mode, run the below command:

.\venv\Scripts\pip.exe install -e .

The output should look similar to the image below:

Please take a look in:

  • F:\self_install\venv\Lib\site-packages\
  • F:\self_install\src\self_install.egg-info\
Create And Run The Application

We are now ready to create the application. It is so simple, so I will just list the content of the files one after another, and will not discuss the content.

File F:\self_install\.env:
FLASK_APP=app.py
FLASK_ENV=development
SECRET_KEY=">s3g;?uV^K=`!(3.#ms_cdfy<c4ty%"
File F:\self_install\src\self_install\__init__.py:
"""Flask app initialization via factory pattern."""
from flask import Flask

from self_install.config import get_config

def create_app():
    app = Flask( 'self_install' )

    app.config.from_object( get_config() )

    # A simple page that says hello
    @app.route('/hello')
    def hello():
        return 'Hello, World!'

    return app
File F:\self_install\src\self_install\config.py:
"""Flask app config settings."""
import os

class Config:
    """Set Flask configuration from .env file."""

    # General Config
    SECRET_KEY = os.getenv( 'SECRET_KEY' )
    FLASK_APP = os.getenv( 'FLASK_APP' )
    FLASK_ENV = os.getenv( 'FLASK_ENV' )

def get_config():
    """Retrieve environment configuration settings."""
    return Config
File F:\self_install\app.py:
"""Flask Application entry point."""

from self_install import create_app

app = create_app()

If everything is working correctly, we should be able to query the application routes with the following command:

.\venv\Scripts\flask.exe routes

The output should look similar to the image below:

We can now run the application with:

.\venv\Scripts\flask.exe run

Paste the following http://127.0.0.1:5000/hello into a browser, and we should get Hello, World! response. The application is now complete. We can now prepare the built distribution.

Prepare and Test the Built Distribution

The following command will do the built distribution:

.\venv\Scripts\python.exe setup.py bdist_wheel

The output should look similar to the image below:

Please note the following two directories created by the above command:

  • F:\self_install\build\
  • F:\self_install\dist\

The output file is F:\self_install\dist\self_install-1.0.0-py3-none-any.whl. The components of this file name are:

{project name}-{version}-{python tag}-{abi tag}-{platform tag}

Please see PEP 427 – The Wheel Binary Package Format 1.0 — https://peps.python.org/pep-0427/#file-format

This file can be copied to another machine, another virtualenv, then install with pip. For this post, I am creating another virtual environment under D:\test\, copy self_install-1.0.0-py3-none-any.whl to D:\test\, and run the below command:

.\venv\Scripts\pip.exe install self_install-1.0.0-py3-none-any.whl

If everything goes well, the output should look like the image below:

Next, we install the Waitress web server — https://docs.pylonsproject.org/projects/waitress/en/latest/ with:

.\venv\Scripts\pip.exe install waitress

Then we can launch the application with:

.\venv\Scripts\waitress-serve.exe --call self_install:create_app

The output of those two commands above shown below:

Despite http://0.0.0.0 stated by waitress-serve.exe, the correct address is localhost — copy and paste http://localhost:8080/hello into a browser address, we should get Hello, World! response as before.

This concludes this post… I had fun writing this. For me, I found it useful. I hope you get something out of this post, and thank you for reading.

Design a site like this with WordPress.com
Get started