

We previously covered two Google APIs:
- Using the YouTube Data API v3 with API Keys and OAuth 2.0.
- Google AI Gemini API: A Complete Example of a Python Flask ChatBot
Now, let’s set up the credentials for Google Translation and
get the official example running successfully.
❶ Obtaining credentials involves two steps:
- Create a Google Cloud Project to house the Cloud Translation API.
-
Install and run the
gcloud CLIto create the credentials file on the local development machine.
⓵ Create a Google Cloud Project to house the Cloud Translation API.
This step is similar to the first part of creating a cloud project for
YouTube Data API v3.
Using the Google Cloud Console, we create a new project and enable the Cloud Translation API. That’s all we need to do for now. (We create credentials in the next step.) We are then taken to a screen similar to the screenshot below:
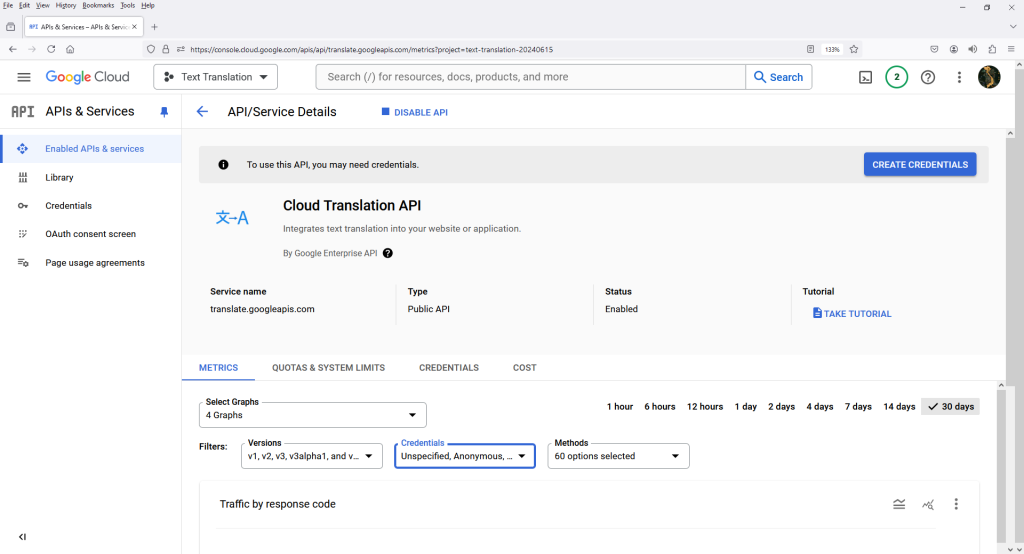
I left everything at the defaults. I accidentally clicked on the
CREATE CREDENTIALS button, without any anticipation
of what would happen next. On the next screen, as seen below:
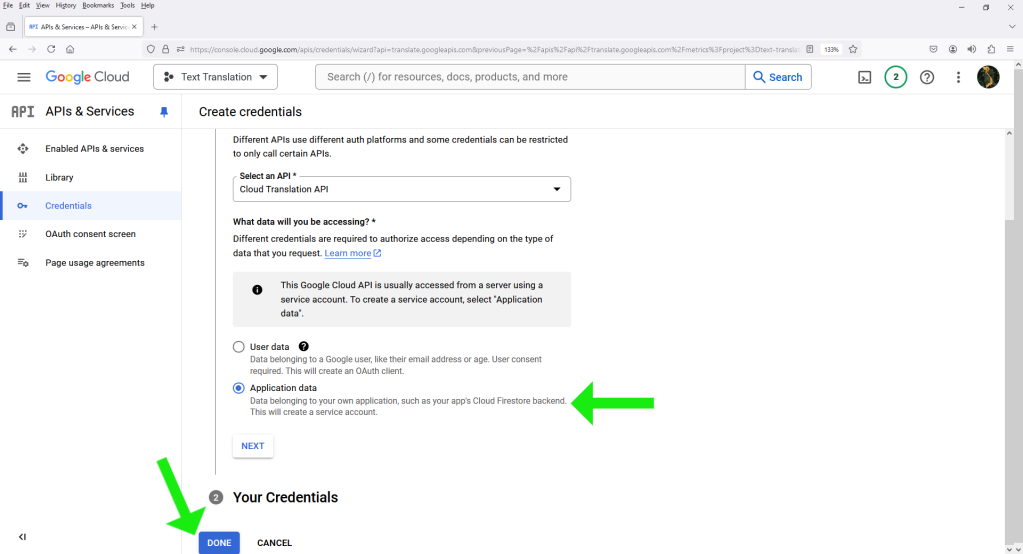
I just selected Application data and clicked on the
DONE button: then I was taken back to the previous screen.
I’m not sure if this had any impact on the process.
I’m unsure how to find these screens again when visiting the
Google Cloud Console
subsequently.
⓶ To access the Google Translation service from your local development machine,
you’ll need to create a credentials file using the gcloud CLI. Follow the
instructions in the official documentation: Install and initialize the gcloud CLI.
The final outcome of this process is the creation of a credentials JSON file, located at the following paths:
▶️Linux, macOS: $HOME/.config/gcloud/application_default_credentials.json
▶️Windows: %APPDATA%\gcloud\application_default_credentials.json
For more information about these credentials files, refer to the Google Cloud documentation on User credentials provided by using the gcloud CLI.
● On Windows 10, after downloading the Google Cloud SDK installer
(GoogleCloudSDKInstaller.exe), run it as an administrator.
You will be prompted to log in to continue. Google will initiate an
authentication process using your default web browser. Make sure to select
the correct account. Once complete, you should see a screen like the one
shown below:

The console is now asking us to select a project. Please see the screenshot below:
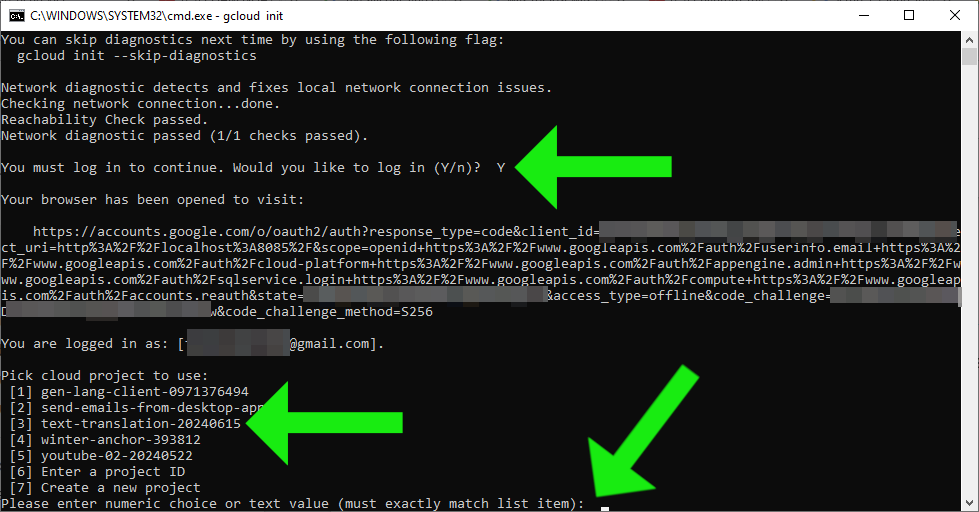
We should select the project we just created. The response is shown in the screenshots below:
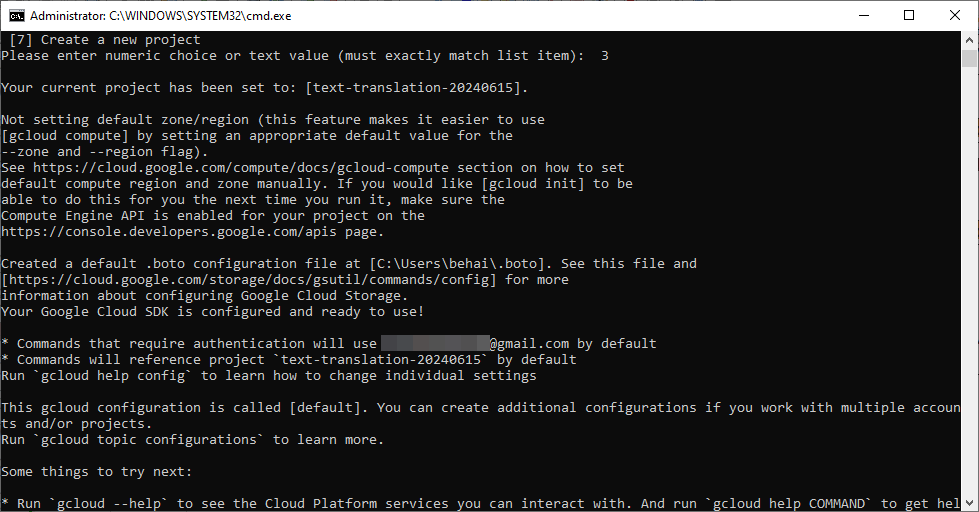
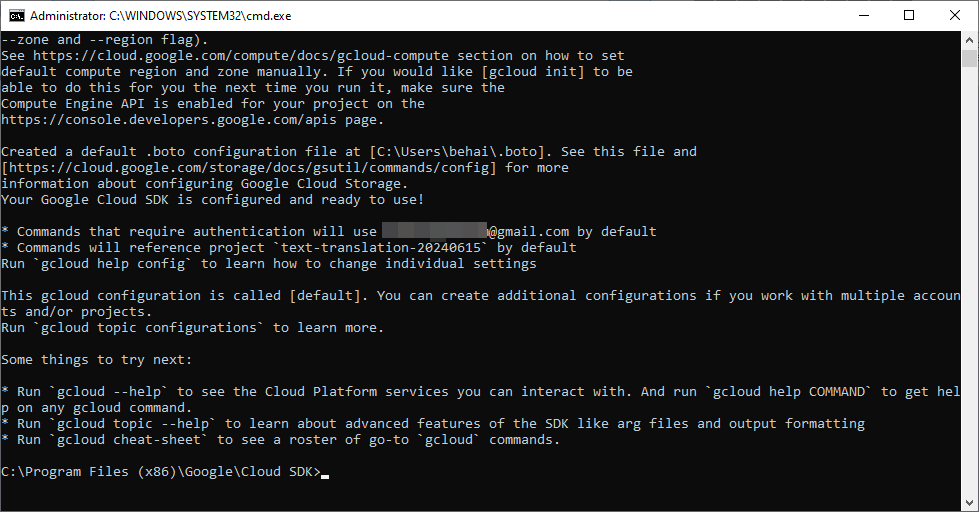
The above process did not create the credentials file
application_default_credentials.json in
C:\Users\behai\AppData\Roaming\gcloud\. Instead, the folder contains
credentials.db, access_tokens.db and default_configs.db,
among other files. These three files are
SQLite database files and,
while they appear to contain credentials, they are not.
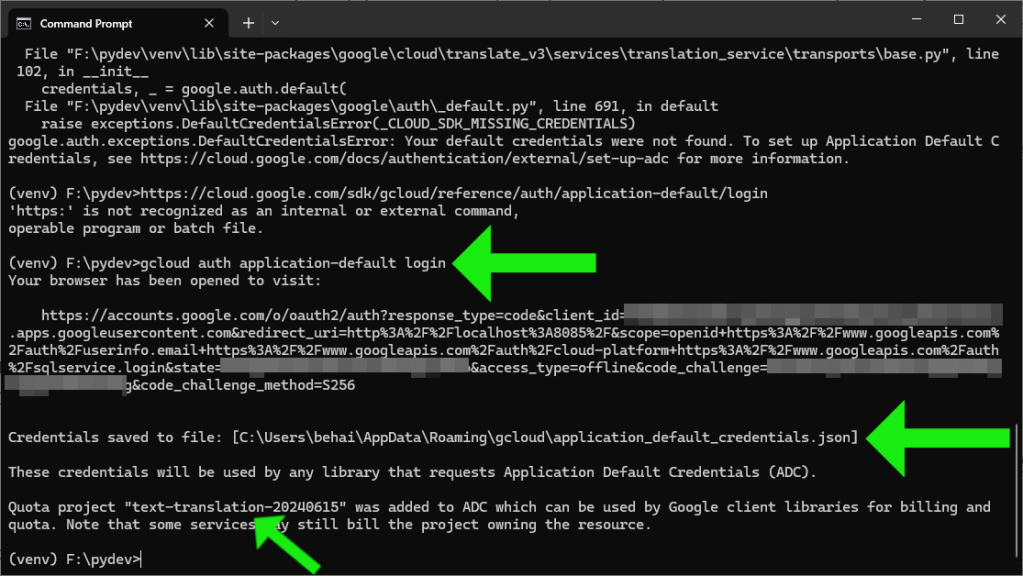
I attempted to run the official example at this point. I got the below exception:
...
    raise exceptions.DefaultCredentialsError(_CLOUD_SDK_MISSING_CREDENTIALS)
google.auth.exceptions.DefaultCredentialsError: Your default credentials were not found. To set up Application Default Credentials, see https://cloud.google.com/docs/authentication/external/set-up-adc for more information.
This was to be anticipated. Based on the link given in the above exception, I ran the following command:
▶️Windows 10: gcloud auth application-default login
I followed the prompted instructions. The credentials file was created after the login process was completed successfully. And the official example executes successfully, too. Please see the screenshot below:
● On Ubuntu 22.10: I just followed the instructions in the document mentioned above, but for Linux: Install the gcloud CLI | Linux. It worked the first time. I am describing my observation of the process.
To determine the Linux platform and kernel architecture, run the following command:
▶️Ubuntu 22.10: behai@hp-pavilion-15:~$ uname -a
I have the following output:
Linux hp-pavilion-15 5.19.0-46-generic #47-Ubuntu SMP PREEMPT_DYNAMIC Fri Jun 16 13:30:11 UTC 2023 x86_64 x86_64 x86_64 GNU/Linux
So, the package name I need to download is
google-cloud-cli-480.0.0-linux-x86_64.tar.gz.
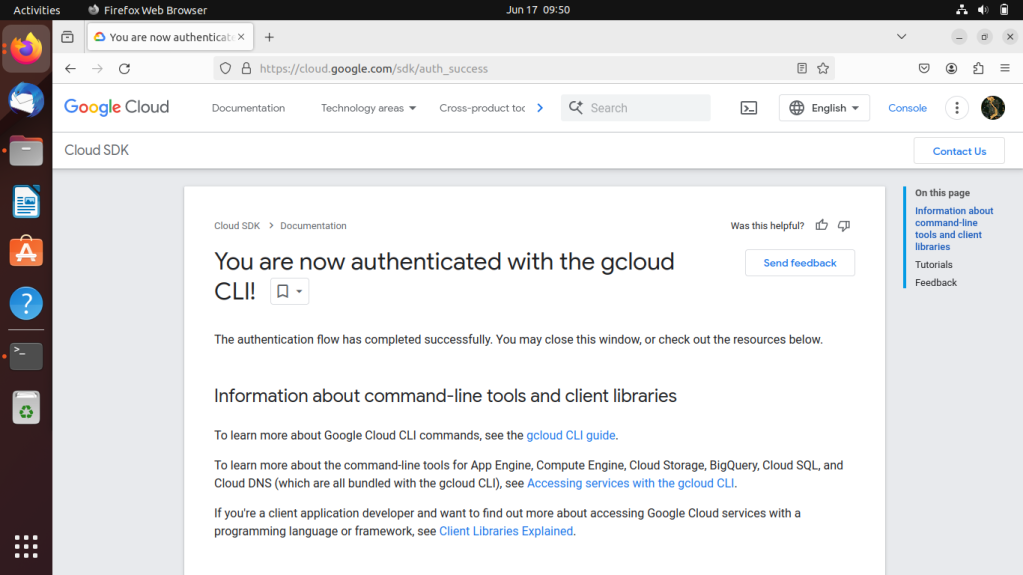
After installation, when running the commands to obtain credentials, ensure you have access to the desktop. The authentication process will require you to use a web browser to select your account and grant permissions, similar to the Windows process.
Note the following:
⑴ Running the command:
▶️Ubuntu 22.10: ./google-cloud-sdk/bin/gcloud init
will initiate the authentication process using your default web browser. You will still need to select your project as described for Windows. This command will create SQLite files, as with the Windows process, but it does not create the credentials file. See the screenshot below for reference:

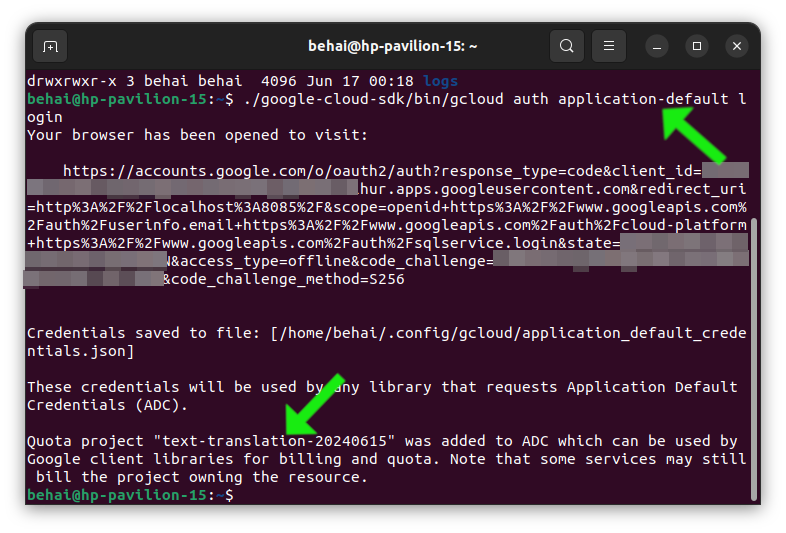
⑵ The command:
▶️Ubuntu 22.10: ./google-cloud-sdk/bin/gcloud auth application-default login
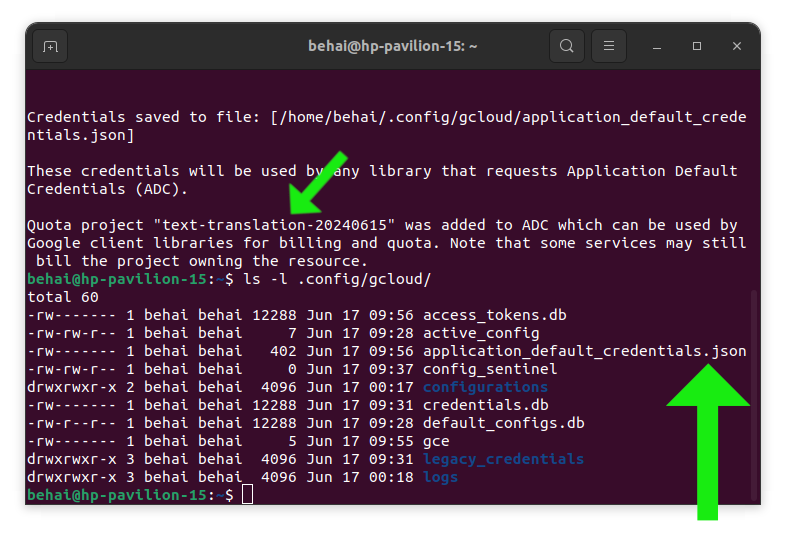
will also initiate the login process. Once completed, it will create
the credentials file at $HOME/.config/gcloud/application_default_credentials.json.
See the following screenshots for illustration:
❷ We are ready to run the example Python program.
⓵ To use the
Cloud Translation – Advanced client libraries
for Python, we need to install them into the active virtual environment,
venv. Use this command:
▶️Windows 10: (venv) F:\pydev>venv\Scripts\pip.exe install --upgrade google-cloud-translate
▶️Ubuntu 22.10: (venv) behai@hp-pavilion-15:~/pydev$ ./venv/bin/pip install --upgrade google-cloud-translate
⓶ The example code is found on the following official page:
Translate text with Cloud Translation Advanced.
This code is not a ready-to-run example; we need to replace the marked constants
with our own data, such as the project_id, and the text to be translated.
I modified the code to translate the following quote by Albert Camus into Vietnamese: “It is the job of thinking people not to be on the side of the executioners.”
Content of google_translate_01.py:
# Imports the Google Cloud Translation library
from google.cloud import translate

# Initialize Translation client
def translate_text(
    text: str, project_id: str
) -> translate.TranslationServiceClient:
    """Translating Text."""

    client = translate.TranslationServiceClient()

    location = "global"

    parent = f"projects/{project_id}/locations/{location}"

    # Translate text from English to French
    # Detail on supported types can be found here:
    # https://cloud.google.com/translate/docs/supported-formats
    response = client.translate_text(
        request={
            "parent": parent,
            "contents": [text],
            "mime_type": "text/plain",  # mime types: text/plain, text/html
            "source_language_code": "en-US",
            "target_language_code": "vi",
        }
    )

    # Display the translation for each input text provided
    for translation in response.translations:
        print(f"Translated text: {translation.translated_text}")

    return response

res = translate_text(
    'It is the job of thinking people not to be on the side of the executioners.',
    'text-translation-20240615' )

print(res)
These screenshots demonstrate how to run the program and show its output.
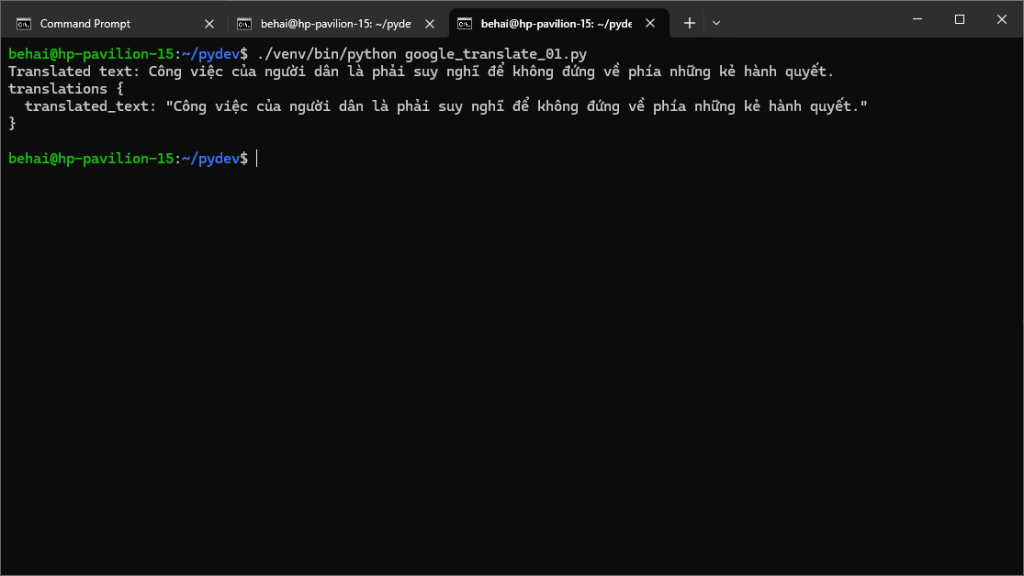
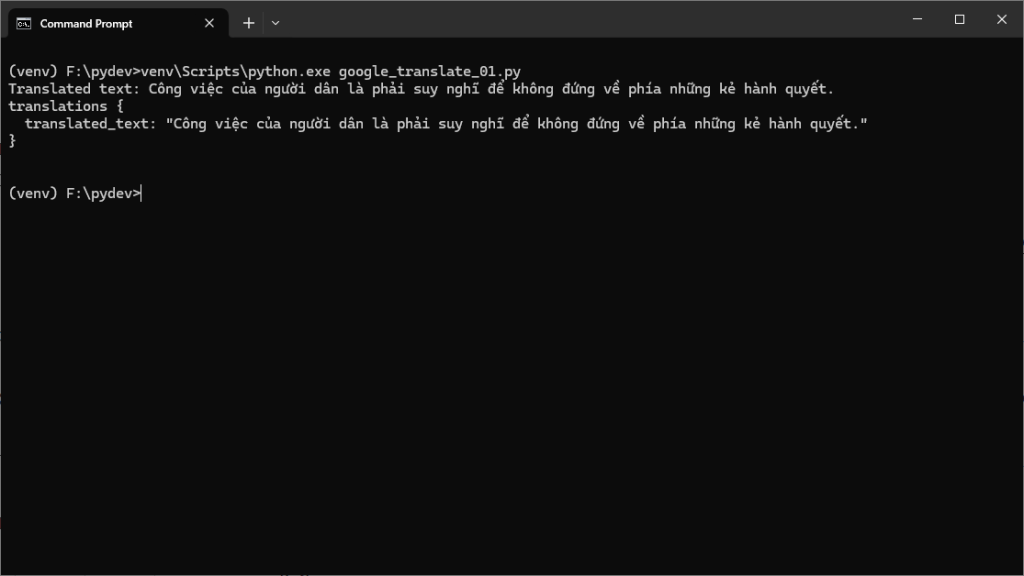
While the translation isn’t perfect, it’s still comprehensible.
This example is not particularly useful on its own, but it serves as proof
that the credentials we obtained are valid for using Google Translation
within a local development environment.
❸ This credential setup exercise has been interesting and informative. While I’ve learned something new, there are still many other topics I haven’t covered. This is a good starting point. If I want to do something more substantial with translation and speech-to-text, I now have a solid foundation to build on.
Thank you for reading. I hope you find the information in this post useful. Stay safe, as always.
✿✿✿
Feature image source:
- https://www.omgubuntu.co.uk/2022/09/ubuntu-2210-kinetic-kudu-default-wallpaper
- https://in.pinterest.com/pin/337277459600111737/
- https://www.google.com/
- https://lh3.googleusercontent.com/w1QGh5p564_r4oMo3rsX6n1gvnt4A-jWNn3xSekpKbrPrQ23a5TmfLuMF4to0YszlBopUlnLAhs-g8nVZXC-
- https://seeklogo.com/vector-logo/332789/python
